
The story in brief
Learn why AI generated characters develop extra fingers, broken joints, shifting faces, and impossible body proportions, then fix those anatomy errors with better prompts, references, shot design, and post production.
Inside this story
Bad anatomy is one of the fastest ways to make an AI generated film feel artificial. A viewer might forgive a strange background, a slightly soft texture, or a prop that changes between shots. They usually notice a hand with six fingers. They notice a face that changes shape halfway through a close up. They notice a shoulder bending in the wrong direction, a wrist with no joint, or a character whose body seems to gain and lose weight from one frame to the next.
These errors are not limited to hands. Bad anatomy includes any visual failure that makes a body look physically impossible, unstable, or inconsistent. It can appear in a still image, an animation, a talking head, a fight scene, a crowd shot, or a supposedly simple walk across a room. The problem becomes harder in video because the defect can move, flicker, or change shape over time.
The good news is that anatomy errors are not random bad luck. They come from identifiable pressures in the generation process. The model may be trying to infer a partly hidden body, compress several poses into one prompt, follow a difficult camera move, or preserve an identity while changing the angle and lighting. Once you understand those pressures, you can design shots that give the model less to guess.
This guide explains what causes bad anatomy in AI filmmaking and how to fix it before, during, and after generation. The goal is not to make every image look like a medical diagram. The goal is a believable body that supports the story and survives long enough on screen for the audience to trust it.
What bad anatomy looks like in AI film shots
Anatomy problems tend to fall into a few recurring groups. Naming the group helps you choose the right fix instead of adding more adjectives to a prompt.
Extra, missing, or fused fingers
Hands are the most familiar failure point. A generated hand may contain too many fingers, fewer than five, fingers joined into a single paddle, or fingers that emerge from the wrong part of the palm. Fingernails can repeat, knuckles can disappear, and the thumb can appear on the wrong side.
The problem is worse when the hand is close to the camera, partly hidden by another object, gripping something, or posed with several fingers overlapping. A hand holding a cup creates multiple boundaries that the model has to interpret at once. A hand holding a sword adds a long prop, a tight grip, and a strong perspective change.
Broken joints and impossible limbs
Elbows and knees may bend in two directions, shoulders may twist beyond a normal range, and ankles may connect to the foot at an odd angle. A generated arm can appear too long in one frame and too short in the next. Sometimes a limb seems to pass behind the torso without a believable shoulder or hip connection.
These errors often appear in action scenes because the prompt asks for a dramatic pose rather than a clear pose. Motion blur and low light can hide the exact defect in a still frame, but movement reveals it.
Shifting faces and unstable features
A face can change even when the character is meant to remain still. The eyes may move closer together, the nose may become narrower, the jaw may change width, or the mouth may drift across the face during speech. Facial hair and makeup may also appear and disappear.
This is partly an identity problem and partly an anatomy problem. The face is a structure of connected landmarks. If the eyes, nose, mouth, ears, hairline, and jaw do not stay in relation to each other, the character feels like a different person even if the general style remains the same.
Body proportion drift
A character may have a small head in one shot and a large head in another. The torso can lengthen, the neck can thicken, and the distance between the shoulders and hips can change. Clothing often makes this harder to see because folds and loose fabric obscure the underlying shape.
Proportion drift is especially damaging in scenes with two or more shots of the same character. The audience may not identify the exact error, but they feel that the person is not anchored in the world.
Duplicate body parts and phantom anatomy
AI images sometimes create a second arm, a partial face, an extra ear, or a ghostly hand at the edge of the frame. These defects occur when the model mistakes reflections, overlapping figures, shadows, or folds in clothing for body parts.
Crowds, mirrors, windows, and transparent materials raise the risk. So do prompts that describe several people in close contact without specifying who owns each visible limb.
Occlusion failures
Occlusion means one object hides another. When an arm crosses the torso or a character sits behind a table, the model has to infer the hidden structure. It may draw a limb that seems to enter the body, place a hand on the wrong side of an object, or reveal a joint where the body should be hidden.
A partially hidden body is not automatically safer than a fully visible body. It can be harder because the model must invent a plausible continuation behind the obstruction.

Why AI models struggle with anatomy
An image or video model does not build a body in the same way a human artist studies a skeleton, muscles, joints, and perspective. It predicts visual patterns from its training data. It can produce a convincing body when the requested pose resembles many examples it has seen. It becomes less reliable when the pose combines unusual angle, occlusion, interaction, motion, and fine detail.
Hands are difficult because they contain small connected shapes with many possible positions. A face is difficult because tiny changes are highly visible. A full body is difficult because the model must maintain a relationship between distant parts while also rendering clothing, lighting, and environment.
Video adds another demand: temporal continuity. A still image only needs to look plausible at one instant. A video shot needs the same character to remain coherent across many instants. If the model generates frames independently or only partially preserves information from one frame to the next, fingers can merge, eyes can wander, and body proportions can pulse.
Prompt wording matters, but prompt wording is not the whole solution. Adding phrases such as “perfect anatomy” or “flawless hands” may influence the output, but it does not supply a pose, a camera plan, or a reliable reference. In some models, a long list of corrections can even crowd out the details that define the scene.
The practical lesson is simple: reduce uncertainty before you ask for polish. Give the model a clear pose, a manageable composition, a stable character reference, and enough resolution to represent the body. Then inspect the result before building more shots around it.
Prevention starts with shot design
The cheapest anatomy fix happens before generation. Good shot design gives the model a body it can understand.
Use a clear pose before a dramatic pose
Start with a pose that has visible structure. A character standing with both feet planted, arms slightly away from the torso, and hands relaxed is easier to generate than a character crouching, turning, reaching, holding a prop, and looking over one shoulder at the same time.
This does not mean every scene should be static. It means you should establish the character in a simple shot before asking for difficult movement. A clean medium shot can establish wardrobe, face, and proportions. Later shots can crop the body, use controlled movement, or build complexity one variable at a time.
When the action is essential, describe the action as a sequence rather than a pile of simultaneous poses. For example, ask for a character who raises the right hand to open a door, pauses, then turns the shoulders toward the hallway. That is easier to reason about than “a character opening a door while twisting dramatically and looking backward.”
Choose a camera angle that protects the structure
Three quarter views often give a face and body enough depth without demanding a full profile or a difficult frontal pose. A straight on portrait can work well for identity, but it places heavy demands on eye alignment and symmetry. A full profile can work when the nose, jaw, and ear are important, but it may expose weak transitions in the neck and shoulder.
Avoid extreme wide angle lenses for anatomy critical shots unless distortion is part of the story. Wide lenses enlarge the nearest hand or foot and make proportion errors more obvious. If the character reaches toward the camera, the hand may occupy a large part of the frame and become the most difficult object to render.
A longer lens and a little more distance can make a body easier to keep coherent. You can still create visual energy with camera movement, blocking, light, and editing.
Keep hands out of the hardest parts of the frame
If a hand does not carry story information, do not make it the hero of the shot. Place it naturally at the character’s side, let it rest on a surface, or crop below the wrist. A medium close up can communicate emotion without displaying every finger.
This is not cheating. Professional film grammar often hides details that do not need attention. The same principle helps AI generated footage. Show the hand clearly when the hand matters. Hide or simplify it when it does not.
Separate competing actions
A character holding a phone, touching a face, opening a bag, and gesturing toward another person creates several interacting hand problems. Break the moment into inserts or simpler shots. Use one shot for the phone, another for the expression, and a wider shot for the relationship between the characters.
Cutting around a difficult action is often more convincing than trying to generate a single flawless take. The audience fills in the missing movement when the edit gives them the right cause and effect.
Prompting techniques that improve anatomy
A prompt cannot guarantee correct anatomy, but it can remove common sources of ambiguity.
Describe visible body structure
Use concrete language about what the camera can see. Specify the number of people, their screen position, the visible side of the body, and the main action. Mention whether the hands are visible, resting, holding an object, or outside the frame.
A useful prompt might say: “One adult woman, medium shot, facing three quarters toward camera, both shoulders visible, right hand resting on the table, left hand outside the frame, relaxed posture, natural human proportions.” This is more useful than a generic request for a beautiful cinematic woman with perfect anatomy.
Do not overload the prompt with anatomy terms that are not visible. If the shot is a head and shoulders frame, there is little value in describing the feet. Extra instructions can create contradictions.
Use negative prompts as guardrails, not magic spells
If the tool supports negative prompts, include concise exclusions such as extra fingers, fused fingers, duplicate limbs, deformed hands, twisted joints, asymmetrical eyes, warped face, and duplicated person. Keep the list relevant to the shot.
Negative prompts work best when paired with positive structure. “No extra fingers” is weaker than a prompt that gives the hand a simple resting pose. The model needs a visual alternative, not only a list of forbidden outcomes.
Avoid stacking dozens of negative terms. A huge negative prompt can make the output muddy, generic, or less responsive to the actual scene. Start with the two or three likely failures, then adjust after inspecting results.
Identify left and right carefully
Left and right can be confusing because the character’s left is opposite the viewer’s left in a frontal shot. If the distinction matters, use both a verbal description and a spatial reference. For example: “the character’s right hand, on the left side of the image, holds the envelope.”
For a simple image, this may be enough. For a complex action, use a pose reference or a control system instead of relying on language alone.
Avoid contradictory style instructions
A prompt that asks for a photorealistic body, a flat illustration, a melted surreal texture, and precise anatomical detail is asking the model to solve incompatible goals. Stylization can hide some anatomy issues, but it can also make them harder to detect.
Choose the visual treatment first. If you need a painterly or graphic look, establish that style in a simple pose. Then carry the same style into more demanding shots.
Keep character references consistent
Use a clean reference image with a visible face, stable hair, simple clothing, and an uncluttered background. If the reference itself contains a strange hand, dramatic perspective, or heavy shadow across the face, the model may carry that ambiguity into later shots.
A reference sheet can include a front view, three quarter view, profile, neutral expression, and full body. It does not need to look like a production concept board. It needs to give the model stable landmarks.
A reliable repair workflow
When a generated shot has bad anatomy, do not immediately regenerate the entire scene with a longer prompt. Work through the problem in stages.
Step 1: Identify the first frame where the error appears
Scrub through the video and find the earliest frame where the hand, face, or limb changes. The first visible defect is often caused by a specific action, camera move, occlusion, or transition. If you only inspect the final frame, you may miss the cause.
For a still image, compare the original generation with nearby variations. Look for the shared failure. If every version breaks the hand when it grips the same prop, the interaction is the problem. If only one seed breaks it, select a better variation before changing the prompt.
Step 2: Decide whether to crop, mask, or regenerate
Cropping is the best fix when the anatomy error is near the edge and does not carry story information. A tighter crop can also turn a weak full body shot into a strong medium shot.
Masking or inpainting works when the defect is local. Replace the hand, face, or joint while protecting the parts that already work. Regeneration is better when the body is wrong throughout the frame or when the camera perspective makes a local patch impossible.
Do not repair a whole character if only one finger is wrong. Every new generation creates a chance for the face, clothing, lighting, or background to change.
Step 3: Simplify the area being repaired
For a hand repair, remove the prop temporarily if the tool allows it. Ask for a relaxed hand with the wrist aligned to the forearm. Once the hand is credible, composite the prop back into the shot or regenerate with the prop described more simply.
For a face repair, use a neutral expression and a stable head angle. Strong laughter, shouting, extreme profile, wet hair, and fast motion all make facial repair harder. Restore the identity first, then add expression or movement.
For a joint repair, show enough of the limb to explain the connection. A tiny patch around an elbow may not work if the shoulder and forearm are also unstable.
Step 4: Match lighting and texture
A corrected anatomy patch can look pasted on even when its geometry is right. Match the light direction, contrast, skin texture, grain, sharpness, depth of field, and motion blur. If the original shot has soft backlight and the repair has hard frontal light, the viewer will notice the patch.
Generate at the same resolution when possible. Upscaling a repaired region can create a different texture from the surrounding image. A final grade and film grain pass can help unify small differences, but grading will not hide a mismatched shadow or a face with a different age.
Step 5: Check the shot at normal speed
A frame by frame inspection can make a tiny defect feel enormous. Watch the repaired shot at the intended playback speed, then inspect it again paused at the moments where the body is most visible. The repair must survive both views.
If the problem flashes for one frame and is not story relevant, a cut, dissolve, motion blur, or small timing change may be enough. If the defect persists for several frames, fix the source or cut away earlier.
Fixing specific anatomy problems
Different body failures call for different tactics. Treating every problem as a prompt problem wastes time.
How to fix bad AI hands
Begin with composition. Reduce the hand’s size in frame, use a natural resting pose, and remove unnecessary overlap. If the hand must hold something, use a simple object with a clear silhouette. A cup, book, or handle may be easier than a bundle of thin cables or a pile of jewelry.
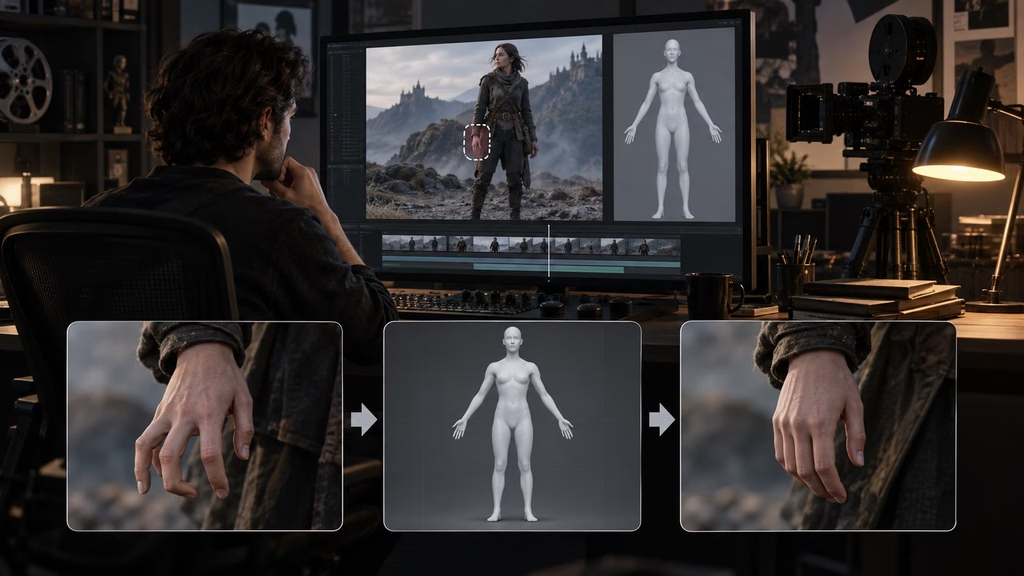
For an inpaint, mask the hand and part of the wrist rather than only the malformed fingers. The generator needs room to rebuild the palm and the joint. Keep the forearm visible so the new wrist has a clear direction.
Generate several variations and inspect the thumb first. The thumb is a useful structural check because it should emerge from the side of the palm and oppose the fingers. If the thumb is wrong, the rest of the hand often is too.
When the hand moves, consider replacing the shot with an insert that uses a controlled still image and subtle camera motion. A hand does not always need to perform a complex action on screen. The cut can imply it.
How to fix shifting faces
Lock the face with a strong identity reference and reduce unnecessary head movement. For dialogue, start with a three quarter or frontal angle where both eyes are easy to track. Keep the mouth movement moderate if the model struggles with lip shapes.
If the face drifts during a long shot, split the shot into shorter clips. A five second clip with a clear beginning and end is easier to control than a twenty second clip with several emotional beats. Use the edit to hide transitions during a blink, turn, shadow pass, or cutaway.
For local face correction, protect the hair, ears, and outline of the head if they already match. A face replacement that changes the hairline can make the identity feel less stable even if the eyes and mouth improve.
How to fix broken arms and legs
Check the shoulder and hip before repairing the elbow or knee. Limbs inherit their direction from the torso. If the shoulder is twisted, a new forearm may still look disconnected.
Use clear contact points. A foot should meet the floor with a believable weight shift. A hand touching a wall should have a visible relationship to the wall. Contact makes the body easier to read and gives you a reference for correcting proportions.
For walking shots, keep the camera move modest and generate short cycles. A locked or gently moving camera can expose less temporal drift than a fast orbit around the actor. If the legs keep changing, crop to the upper body and let sound design carry the motion.
How to fix bodies behind objects
If a table, car door, or chair hides the lower body, make the occlusion intentional and stable. Keep the camera and object movement simple. The model is more likely to break the body when the obstruction slides across it during a camera move.
You can also use foreground objects as a cut point. Let a passing person, door frame, or shadow cover the transition between two generated clips. The obstruction becomes an edit tool rather than a problem.
Tools and techniques that help
The exact tool names change, but the useful capabilities are consistent.
Pose control
Pose guidance gives the generator a skeletal or reference structure to follow. It is valuable for full body shots, repeated poses, dance, walking, and action scenes. Use a simple pose first. A noisy or overly detailed reference can introduce its own ambiguity.
Pose control is not a substitute for composition. The pose still needs to fit the camera, crop, lighting, and action. A correct skeleton can produce a bad image if the hand is hidden behind a prop or the camera asks for an extreme perspective.
Reference images and character sheets
Reference images help preserve face shape, hair, clothing, and body proportions. Use references that match the intended angle and framing when possible. A full body reference may not be enough for a close facial shot, while a portrait reference may not explain the character’s legs.
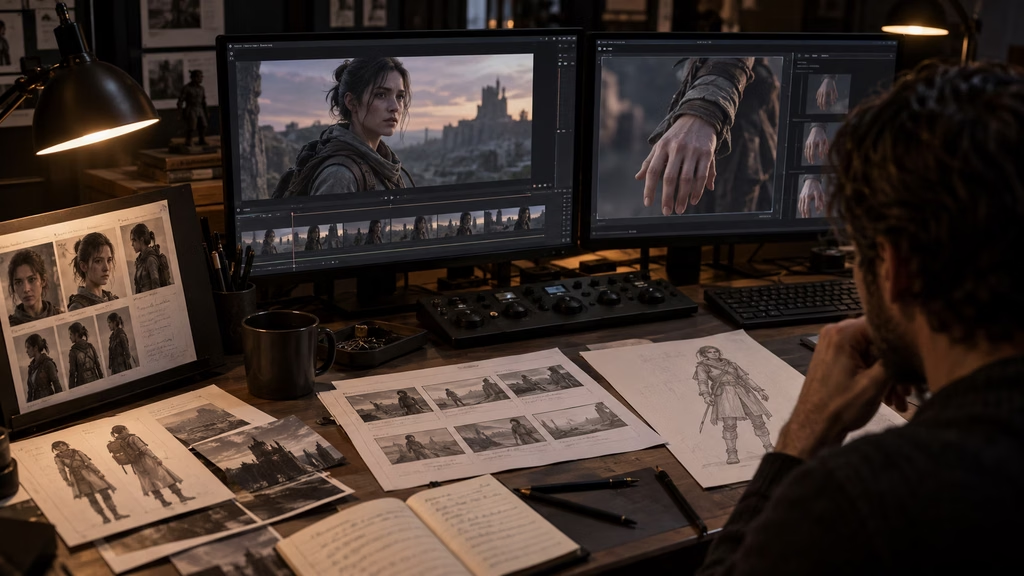
Keep the reference library organized by character and shot type. Label the neutral portrait, full body, profile, and key wardrobe variations. This saves time when a later correction needs the right source quickly.
Inpainting and regional regeneration
Regional tools are useful for small defects. Mask generously enough to include the surrounding anatomy, then constrain the change if the tool supports it. Make one correction at a time so you know which setting helped.
If the tool changes too much outside the mask, lower the denoise or strength value. If it refuses to fix the hand, increase the masked area or use a clearer reference. The right setting depends on the model, so compare results rather than trusting a preset.
Image to video with a stable first frame
For animation, start with a first frame that already has correct anatomy. Video generation tends to amplify ambiguity. If the hand is malformed in the source, motion may turn one defect into several.
Use a short duration and moderate motion. A stable face and body can often support a gentle push in, a small head turn, or a controlled gesture. Add more movement after the identity and proportions hold up.
Tracking and compositing
When a generated patch needs to follow a moving hand or face, track the region in a compositor or editor. A patch that stays locked to the frame will look worse than the original defect.
Match motion blur and depth of field. A sharply detailed replacement inside a blurred action shot attracts attention. It may be better to blur the patch slightly, but only after the geometry is correct.
Temporal anatomy: why video exposes defects
A still image can hide a broken finger in shadow. Video gives the audience multiple views of the same body. Each frame becomes evidence, and contradictions accumulate quickly.
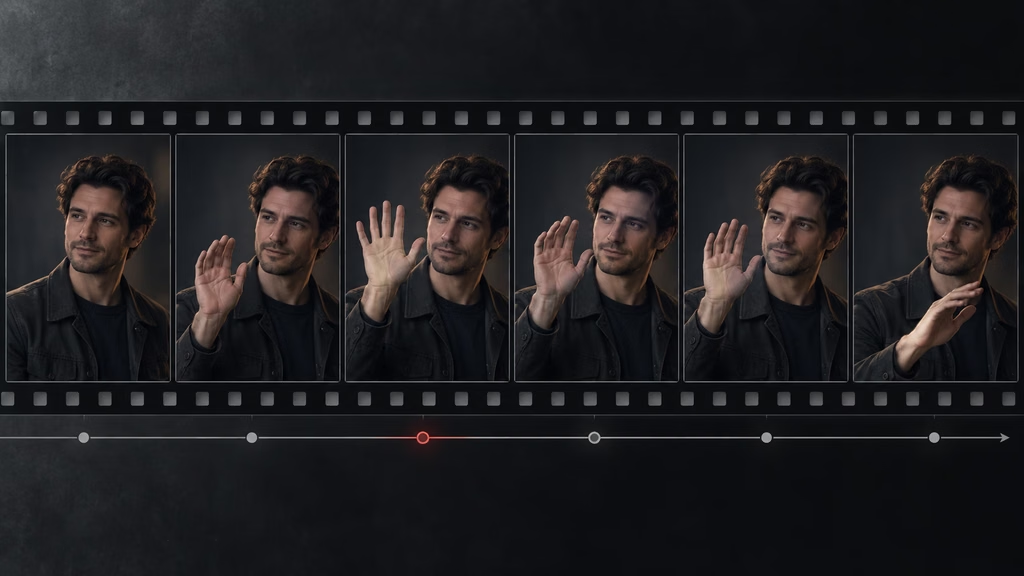
Temporal anatomy problems include flickering fingers, eyes that change size, hair that grows into the face, clothing that reveals and hides limbs, and body parts that slide instead of rotating around a joint. The model may preserve the overall silhouette while losing the small landmarks that make the body feel alive.
To reduce temporal failures, shorten the shot and lower the number of simultaneous changes. A locked camera with one gesture is easier than a fast orbit, a body turn, a prop interaction, and changing light. If you need a complex moment, generate it as several shots and cut them together.
Use motion that gives the model a reason to keep a structure. A slow turn has a continuous path. A sudden change from a frontal pose to a crouch asks for a large unseen transition and often produces a broken body in the middle.
Review the clip on a loop. Many anatomy errors are easiest to spot when the clip repeats. Watch the hands, eyes, shoulders, knees, and contact points. Do not only watch the center of the frame. A background figure with a broken arm can pull the audience out of the scene even when the lead looks good.
What not to do
Do not assume a negative prompt will repair a bad pose. If the character’s arm is hidden behind the torso, the model has limited evidence. Change the composition or provide a reference.
Do not keep generating the same difficult shot with tiny wording changes. If ten variations all fail at the same hand interaction, the shot design is telling you something. Simplify the action, change the lens, crop the frame, or split the moment into inserts.
Do not use a face swap or hand patch without checking the surrounding motion. A replacement can solve one frame and create a visible jump in identity, lighting, or texture.
Do not let a technically correct body dominate the story. Anatomy is in service of the shot. If fixing the hand requires a long close up that adds no meaning, cut away. If a subtle shadow hides a background error while preserving the mood, use the shadow. Good filmmaking is selective.
Do not publish a shot because the thumbnail looks fine. Open the full resolution file and watch the clip at normal speed. Small hands and faces can look acceptable in a contact sheet while failing badly in motion.
A practical quality checklist
Before approving an AI generated shot, inspect it in this order:
1. Count the people and confirm that every visible limb belongs to the correct person. 2. Check the face landmarks, especially the eyes, nose, mouth, jaw, and ears. 3. Follow each arm from shoulder to hand and each leg from hip to foot. 4. Look at the thumbs, wrists, elbows, knees, ankles, and contact points. 5. Compare body proportions with the character reference and nearby shots. 6. Scrub the video for flicker, drift, duplicated parts, and sliding joints. 7. Check reflections, shadows, silhouettes, and objects that hide the body. 8. Watch the shot at normal speed and at the final intended crop. 9. Decide whether a crop, cut, mask, inpaint, or full regeneration is the smallest reliable fix. 10. Recheck the repaired shot beside the shots before and after it.
Keep a note of recurring failures by model, prompt style, camera angle, and action. Over time, this becomes a useful production guide. You may discover that one model handles frontal portraits well but struggles with hands holding objects, while another handles action poses but changes faces. Use that knowledge when assigning shots.
Building a safer AI filmmaking pipeline
A dependable pipeline separates identity, pose, motion, and finishing instead of asking one generation to solve everything at once.
First, create a character reference with a neutral expression and simple pose. Verify the face and full body before adding cinematic styling. Next, create a small set of shot references that match the camera angles you plan to use. Then generate short clips with one primary action. Finally, repair local defects, add sound, edit the shots, and apply a consistent grade.
This order matters because every later stage depends on the earlier structure. If the character reference is unstable, more detailed prompts will not create a stable identity. If the pose is unclear, cinematic lighting will only make the error harder to diagnose. If the first frame is malformed, animation will give the defect more time to move.
Leave room for human judgment. A person should review anatomy before a shot enters the edit, not only after the whole sequence is assembled. Early review prevents a broken reference from spreading through ten derived shots.
It also helps to maintain a reject folder. Save failed generations with a short note such as “right hand gripping prop,” “profile jaw drift,” or “leg breaks during camera orbit.” Those failures are useful evidence. They show which combinations your current workflow should avoid.
Final thoughts on bad anatomy in AI filmmaking
Bad anatomy is not one problem with one button. It is a signal that the shot asks the generator to infer too much, preserve too much, or change too much at once.
The strongest fixes are usually practical. Simplify the pose. Give the model a useful reference. Choose a camera angle that does not exaggerate the nearest limb. Keep hands out of frame when they do not matter. Generate shorter clips. Repair the smallest region possible. Cut around a difficult action when the story allows it.
Use prompts to clarify the shot, not to argue with the model. Use negative prompts as short guardrails. Use pose controls, inpainting, tracking, and compositing when they solve a specific failure. Then watch the result at full size and normal speed.
A believable AI film does not require every frame to display perfect anatomy. It requires the audience to trust the body long enough to care about the person, the action, and the scene. Good shot design makes that trust much easier to earn.
Frequently asked questions
Why do AI generated hands look wrong?
Hands combine many small shapes, joints, and overlapping fingers in a small area. They become even harder when they hold an object, touch another person, or point toward the camera. Use a simple pose, reduce the hand’s size in frame, provide a reference, and use inpainting for local repairs.
Can negative prompts fix bad anatomy?
They can reduce common failures, but they cannot replace a clear pose and composition. Use a short negative prompt that matches the shot, such as extra fingers, fused fingers, duplicate limbs, and twisted joints. If the same error keeps returning, redesign the shot.
How do I fix anatomy errors in AI video?
Find the first frame where the error appears, then decide whether to crop, cut, mask, inpaint, or regenerate. Shorter clips and smaller movements are easier to stabilize. Match the repaired area’s lighting, texture, sharpness, and motion blur to the surrounding footage.
Should I hide hands in AI filmmaking?
Hide hands when they do not carry story information. Show them clearly when the action matters, but give the model a simple pose and enough space to render the wrist and fingers. Cropping is a normal filmmaking choice, not a failure.
How can I keep a character’s face consistent?
Use a clean identity reference, keep the head angle manageable, limit extreme expressions, and generate shorter clips. Compare facial landmarks between shots. If the face drifts during a long take, cut the take into smaller pieces and hide transitions during natural movement or a cutaway.
What is the best first step when a full body generation fails?
Simplify the pose and camera. Start with a standing or seated reference where the shoulders, hips, elbows, knees, and feet are easy to read. Once the character is stable, add movement, props, and more complex framing one change at a time.
Continue reading
Further insights from the Journal


Have a story in mind?
Bring your next project into focus.
Tell us what you are creating and what you want the audience to feel.