The story in brief
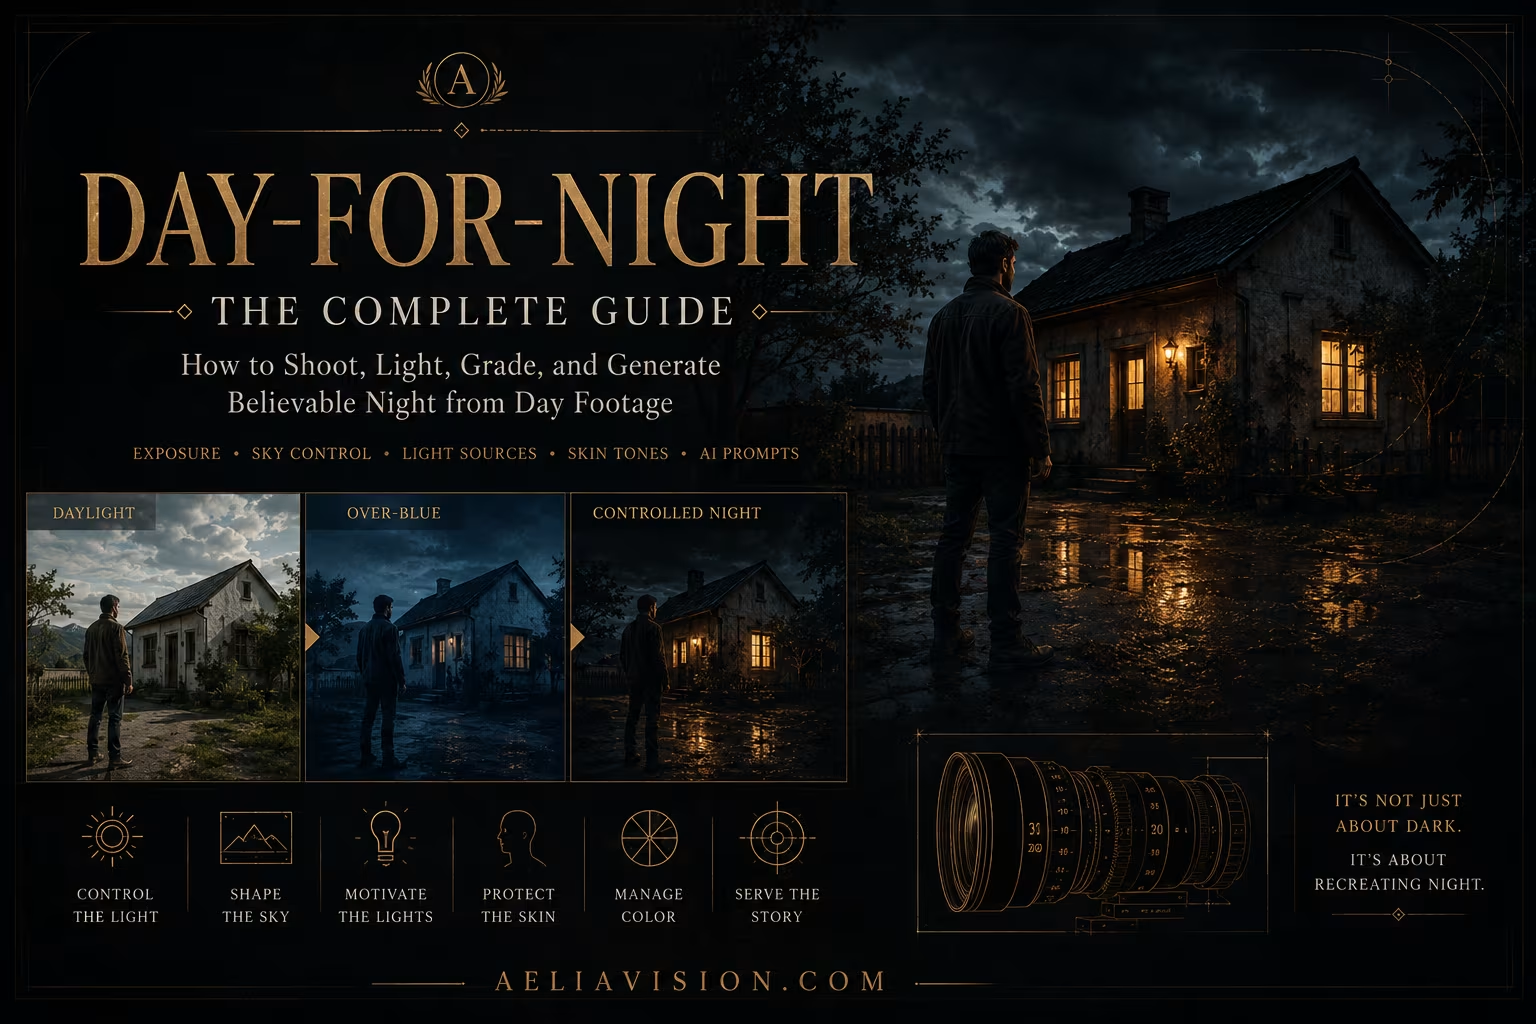
Day-for-night is the process of making footage shot in daylight appear to take place at night. It can be done through careful planning on set, through color grading, through exposure and lighting choices, or through a combination of all three.
Inside this story
Day-for-night is the process of making footage shot in daylight appear to take place at night. It can be done through careful planning on set, through color grading, through exposure and lighting choices, or through a combination of all three.
The technique is more demanding than simply turning the image blue and dark. A convincing night scene needs a believable light source, controlled highlights, readable shadows, restrained color, and a relationship between the sky, ground, faces, and practical lights. If the image is dark but still contains bright daylight cues, the audience notices the contradiction.
The best day-for-night work begins before the grade. Shooting in the right conditions, controlling the sun, protecting highlights, and keeping the scene away from direct midday light make the transformation easier. In AI filmmaking, the same idea appears in the prompt and reference frame. You need to describe what night light looks like, not only ask for a dark image.
This guide explains the visual logic of day-for-night, how to shoot or generate source material, how to grade it, how to handle skies and skin, and how to avoid the shortcuts that make a night scene look like a blue daytime image.
What day-for-night is trying to imitate
A real night scene is not simply a daytime scene with less exposure. The sources of light are different. The sun is absent or much weaker. The sky may provide a cool ambient level. Windows, streetlights, vehicles, moonlight, signs, and practical lamps create selected pools of illumination.
A real night scene also has a different contrast structure. The background falls away more quickly. Bright sources stand out against darkness. Shadows may contain color, but they do not usually look like bright blue daylight shadows.
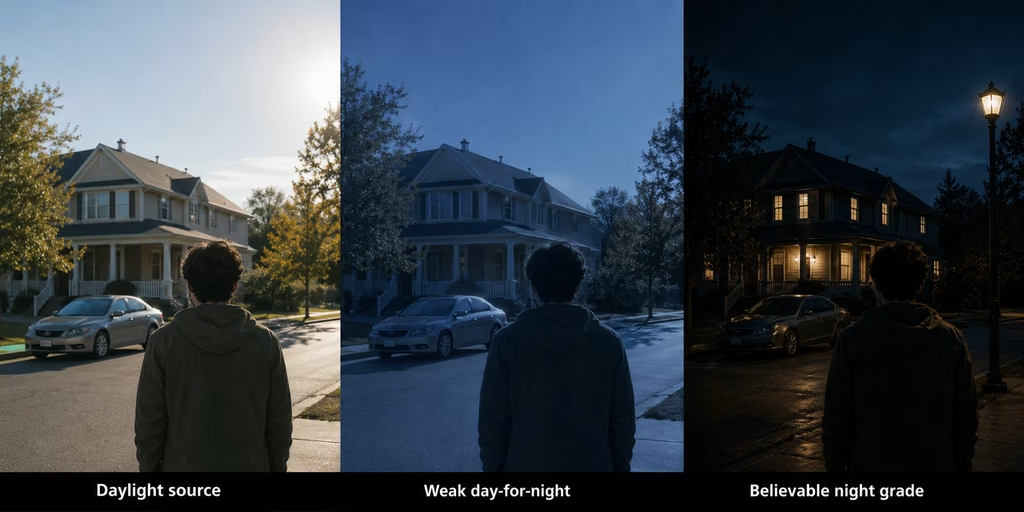
Day-for-night tries to recreate those relationships from material captured in daylight. The grade may lower exposure, cool the image, reduce saturation, control the sky, and add or strengthen practical sources. The transformation works when the original frame already has a lighting direction and a composition that can accept the change.
It fails when the footage contains hard overhead sunlight, bright blue sky, deep sun shadows, and daylight reflections that cannot be explained at night.
Choosing source footage
The source image determines how much work the grade can do. Start with conditions that already resemble low light in direction and contrast.
Overcast daylight
Overcast footage is often easier to transform because the light is broad and shadows are soft. The sky may still be bright, but the image does not contain the hard, obvious direction of midday sun.
You still need to control exposure and sky color. A pale overcast sky can become a dark blue-gray background, while a very bright sky may need a mask or replacement.
Late afternoon or early morning
Low-angle sunlight can create a useful direction. The long shadows and warmer light may be reduced or shifted toward cool ambient color. Warm practicals added in windows or vehicles can complete the night impression.
The source must not look like golden hour after grading. Remove or control the warmth that reveals the daylight time of day.
Backlit scenes
Backlight can work if the bright source is controlled. A subject in silhouette against a sky may become a night exterior, especially when the sky is replaced or darkened. Keep the edge light believable and avoid a bright sun rim that no moon or practical can explain.
Avoiding midday sun
Direct overhead sun creates short, hard shadows and bright reflections. Those cues are difficult to hide. A dark grade may turn the shadows black while the highlights still look like noon.
If you must use midday footage, add or remove cues through compositing, masks, light shaping, and replacement elements. The grade alone may not be enough.
Exposure for day-for-night
Underexposure is part of the transformation, but simply lowering exposure globally is not enough. You need to decide what remains visible and what disappears.
The sky may need to become darker than the ground. Bright surfaces may need to be reduced. Faces may need a separate adjustment so the performance remains readable. Practical lights may need to become the brightest elements in the frame.
A typical workflow lowers the overall exposure, then restores selected areas. This is different from making the whole image equally dark.
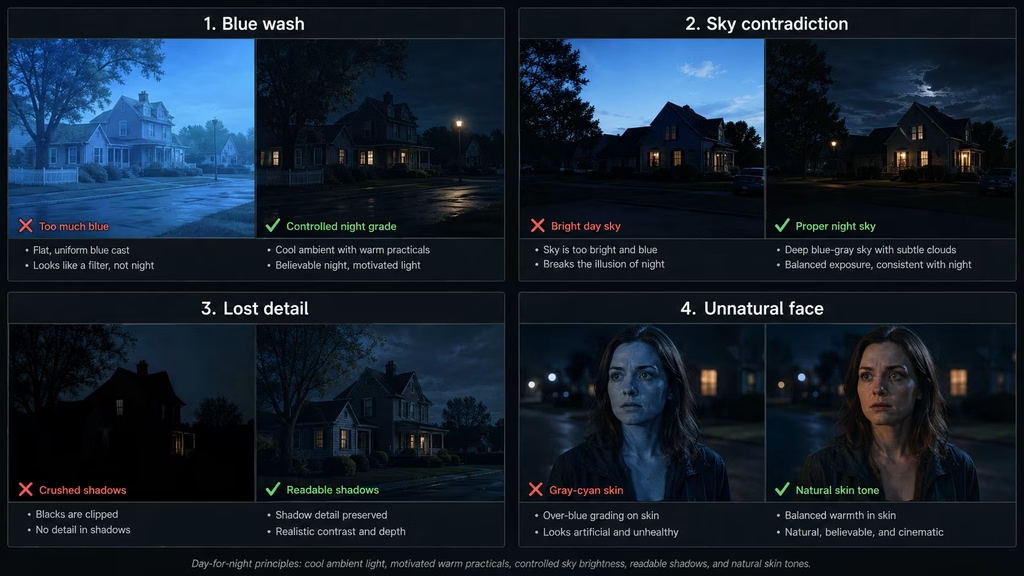
Keep the shadow floor controlled. If you crush every dark area, the scene loses texture and becomes a collection of black shapes. Night has information, especially near light sources.
Use the waveform and histogram when working with real footage, then judge the frame without scopes. A technically dark image may still contain daylight relationships that the audience sees immediately.
The sky problem
The sky is one of the strongest time-of-day clues. A bright blue daytime sky rarely becomes believable night simply through a global grade. It may need to be darkened, desaturated, replaced, or shaped with a gradient.
A real night sky can be nearly black, deep blue, gray, or hazy depending on conditions and light pollution. Stars are not always necessary. Adding too many creates a fantasy image rather than an ordinary night.
Watch the horizon. A darkened sky that ends in an obvious mask line breaks the scene. Blend the transition with haze, clouds, silhouettes, or a controlled gradient.
Clouds can help because they provide texture after the sky is darkened. A completely flat blue replacement may look artificial. If the sky needs replacement, match its perspective, grain, color, and light direction to the foreground.
Cool ambient light and warm practicals
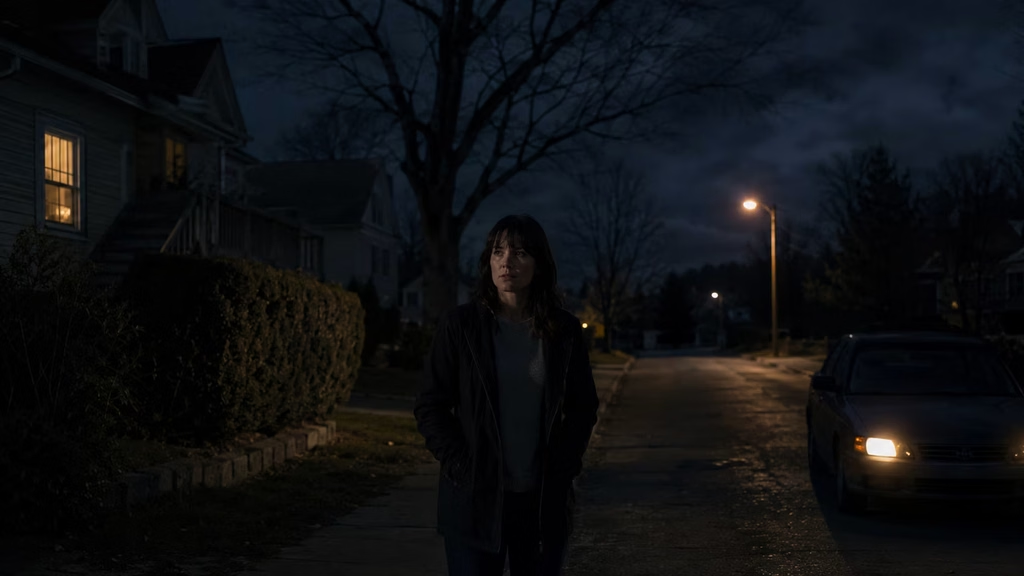
A believable night scene usually has more than one color. Cool ambient light can fill the environment while warm lamps, windows, headlights, or signs create selected highlights.
This contrast gives the audience a reason to believe the darkness. The world is not blue because the grade says so. The cool light belongs to the sky or surrounding environment, while the warm sources belong to visible objects.
Keep the warm sources limited. If every window glows orange, the image becomes decorative. Choose the lights that matter to the story or the location.
Practical lights should affect nearby surfaces. A warm window should create a small amount of color on the wall or ground. A streetlamp should have falloff. A car headlight should shape the road and the subject rather than become a floating bright spot.
White balance and color temperature
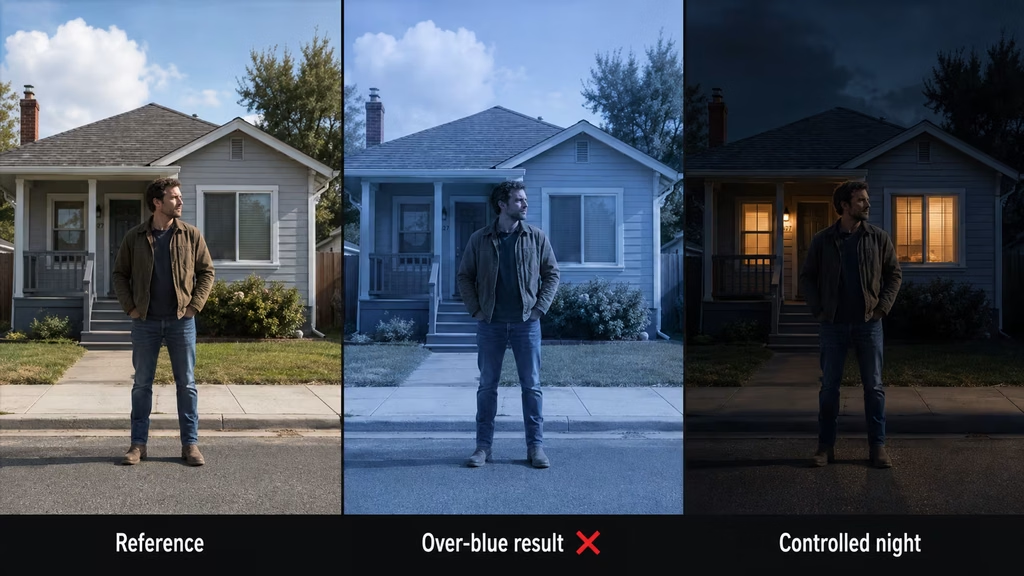
A cool grade helps suggest moonlight or night ambience, but the amount matters. Strong blue color across the whole frame is one of the fastest ways to make day-for-night look artificial.
Start with a controlled cool shift in the environment. Protect warm practicals and skin when the scene needs them. Keep the cool color more neutral in the deepest shadows so the image does not become a blue wash.
Green and magenta casts can appear in mixed-light scenes. Correct unwanted casts before setting the night temperature. A green fluorescent source may remain green if it belongs to the location, but accidental green across the whole frame makes the grade look broken.
Use color temperature to separate sources. Cool window or sky light can coexist with warm lamps. The contrast should be visible but not exaggerated.
Skin tone in day-for-night
Faces are often the hardest part of a day-for-night conversion. If you lower the exposure and cool the whole frame together, skin may become gray, blue, or lifeless.
Use a soft local adjustment to keep the face readable. The face should still belong to the night light. Do not paste daytime skin onto a blue environment. Reduce warmth enough to connect the person to the scene while preserving natural color variation.
If the subject is lit by a practical, let that source warm the skin. If the subject is in cool open shade, keep the face cooler but protect it from cyan.
Check the neck and hands. A face that looks corrected while visible hands remain orange or gray creates a mismatch.
Contrast and shadow detail
Night scenes often have a lower visible level, but they still need a useful value structure. Keep texture near light sources. Let the areas outside the light fall away gradually.
A strong S-curve can create night density, but it can also crush faces and buildings. Use masks or local curves when the environment needs to become darker than the subject.
The shadow color may be cool, neutral, or slightly warm depending on the sources. Avoid making every shadow blue. A neutral deep shadow can give the cool practical light more room to read.
The grade should preserve depth. A foreground tree, subject, and distant building can separate through value, haze, and color. If all three become the same dark blue, the scene becomes flat.
Day-for-night and lenses
Lens choice affects how convincing the transformation feels. A wide lens shows more sky, ground, and environment, so every daylight cue needs attention. A normal lens gives you a manageable balance. A longer lens can simplify the background and isolate a subject or practical.
A wide shot can establish the night location, but a tighter lens may be better for dialogue or faces. The conversion should not force the same treatment on every shot. Match the night logic while allowing different compositions to hold different amounts of information.
Depth of field also affects the impression. A shallow portrait with a warm practical in the background can suggest night without showing the entire sky. A deep-focus exterior needs more careful control of the landscape and horizon.
Day-for-night and camera movement
Movement reveals inconsistencies. A mask may slip as the camera pans. The sky and foreground may not track correctly. A practical light may remain fixed when the camera moves past it.
Track the sky, windows, bright surfaces, and skin adjustments through the shot. Check the edges of the masks and the relationship between the subject and light sources.
A slow locked-off shot is easier to convert than a fast handheld move, but both can work. If the camera crosses from daylight into a darker area, let the change have a physical cause.
For AI video, keep the movement moderate and state that the night palette must remain stable:
“Preserve the cool moonlit environment, dark sky, warm window lights, and natural skin tone throughout the slow tracking shot. Do not brighten the scene or change the time of day during motion.”
Shooting day-for-night footage
The conversion becomes easier when the original footage is planned for it.
Shoot during a time with soft light or backlight. Avoid hard overhead sun and bright reflective surfaces. Keep the camera exposure controlled so highlights are not clipped. Underexpose slightly when appropriate, but retain useful shadow detail.
Control the sky when possible. Compose so a replacement or darkening mask can blend naturally. Use real practical sources in the scene, even if they will be enhanced later.
Avoid clothing and production design that clearly announces daytime. Bright white fabric, shiny surfaces, and strong warm sunlight can be difficult to transform.
The camera angle matters. A low-angle frame with a large sky may require more work than a medium shot inside a location. Choose the amount of transformation the story and budget can support.
AI image generation for day-for-night
AI models can create night images directly, but a day-for-night prompt can be useful when you want to preserve a daytime composition or reference frame.
Describe the visible night conditions:
“Transform the supplied daylight composition into a believable night scene. Dark blue-gray sky, cool ambient light, controlled shadows, warm practical windows with falloff, natural skin, no daylight sun, no bright blue wash.”
For a new image:
“Night exterior with cool ambient sky light, warm streetlamps, dark but detailed shadows, controlled highlights, restrained saturation, realistic skin, no visible daylight cues.”
Avoid asking for “dark blue cinematic night” without sources and detail. The model may produce a bright blue filter with no physical light.
AI image-to-video workflow
Start with a night reference frame that already contains the correct palette. A model has less work to do when the still shows dark sky, motivated sources, and believable shadow relationships.
Keep the camera movement simple. A slow push-in, locked-off frame, or gentle tracking shot gives the model fewer changes to manage. Protect the face and practical lights in the prompt.
If the scene needs a change, connect it to movement through space:
“The camera follows the character from the cool street into the warm house entrance. The color changes at the doorway, practical light falls across the face, and the night sky remains visible behind her.”
Do not ask the model to transform daylight into night while also performing a complex orbit and changing the location. Generate the look and movement in manageable steps.
Sky replacement and compositing
Some day-for-night shots need more than grading. Sky replacement, rotoscoping, tracking, and compositing may be necessary when the original sky carries strong daylight information.
Match the replacement sky’s perspective and texture. Add haze at the horizon. Integrate the foreground through color, grain, and light. A sharp artificial sky behind soft footage looks wrong even if the color is correct.
The replacement should respond to the camera move. Track it through pans, tilts, and handheld motion. Check the edges around hair, trees, wires, and buildings.
Add stars only when the location and story support them. Light-polluted skies may contain few or none. A dense star field can make an ordinary night scene feel like fantasy.
Day-for-night in different settings
Rural exterior
A dark landscape can become nearly empty, so keep a moonlit edge, practical, or silhouette that defines the space. Use haze and distant values to preserve depth.
Urban street
Streetlamps, windows, signs, vehicles, and reflections provide many sources. Control them carefully. A city can remain bright at night, but the sources should have falloff and hierarchy.
Forest
Leaves and branches can create dark layers. Avoid turning the entire forest into one black wall. Use cool ambient light and selected edges to keep the route readable.
Beach or open landscape
The sky and horizon carry much of the scene. Control the sky first, then grade the ground and subject to the same night logic.
Interior near windows
The window can become a cool source while a lamp or room practical gives warmth. This is often easier than a wide exterior because the frame contains fewer daylight cues.
Common mistakes
Making the image blue
Color alone does not create night. Add darkness, source direction, controlled highlights, and realistic falloff.
Keeping a bright daytime sky
A vivid blue sky contradicts the night treatment. Darken, replace, or blend it carefully.
Crushing every shadow
Night still contains information. Preserve texture near light and keep faces readable.
Leaving daylight reflections
Bright sunlight on glass, metal, and skin can reveal the original time of day. Control the highlights or choose a different source frame.
Ignoring warm practicals
A scene with no visible light source can look like a blue filter. Use windows, lamps, streetlights, vehicles, or moonlight with believable falloff.
Turning skin gray
Protect the face while keeping it connected to the night environment. Check hands and neck as well.
Using one grade for every angle
Different shots contain different sources and exposures. Match the night relationship rather than forcing identical values.
Adding too many stars
A dense star field can make the scene look artificial or place it in the wrong environment. Keep the sky appropriate to the location.
Forgetting movement
Masks and color adjustments need to track. Watch the shot for slipping edges and changing light.
Starting with impossible footage
Hard midday light, clipped highlights, and bright blue sky may require extensive compositing. Shoot or generate a better source when possible.
Prompt templates
Exterior night conversion
“Transform this daylight exterior into believable night. Dark blue-gray sky, cool ambient light, controlled shadows, warm window practicals, restrained saturation, natural skin, no visible midday sun or bright blue daylight cues.”
Urban night
“Night city street with cool blue-gray ambient light, warm streetlamps and windows with realistic falloff, wet pavement reflections, dark detailed shadows, moderate contrast, no neon wash, cinematic 35mm perspective.”
Interior window scene
“Interior at night, cool blue light through the window, warm desk lamp on the character, natural skin, dark but detailed background, practical source visible, restrained contrast and saturation.”
AI video
“Use the reference frame as the starting composition. Preserve the cool night environment, dark sky, warm practical sources, natural skin, and controlled contrast during the slow tracking shot. Do not change the time of day or brighten the scene.”
A practical day-for-night workflow
Start by evaluating the source. Identify the daylight cues that must be controlled: sky, sun direction, reflections, bright clothing, and hard shadows.
Decide what the night sources are. Choose cool ambient light, moonlight, streetlamps, windows, vehicles, signs, or interior practicals.
Correct the source exposure and color. Remove accidental casts before applying the night treatment.
Darken the overall image with control. Preserve faces, practicals, and important objects.
Shape the sky. Use a mask, gradient, replacement, or compositing when a global grade cannot hide the daylight.
Set the cool ambient color. Keep it restrained and protect warm sources.
Add or strengthen practical lights. Give them falloff and influence on nearby surfaces.
Check skin tone and visible hands. Use soft local corrections when needed.
Shape contrast and shadow detail. Keep the scene dark without turning it into empty black.
Match neighboring shots. Compare sources, faces, sky, and shadows across the cut.
Track adjustments through movement. Review masks, edges, reflections, and color drift.
Add grain, haze, or halation only after the night structure works.
Export a test and view it at the intended delivery size.
Day-for-night in the AeliaVision workflow
Day-for-night belongs in the Lighting DNA, Color Palette, and Environment DNA for the project. Record the night source, the cool and warm relationship, the shadow detail target, the sky treatment, and the rules for faces and practicals.
AeliaDirector shot planning can identify which shots can be converted through grading and which need sky replacement or compositing. It can also keep the camera, lens, and movement consistent so the night treatment does not change accidentally between angles.
For AI filmmaking, use a night hero frame as the reference for new shots. Keep the color instruction beside Character DNA and Environment DNA. Generate shorter movement tests and correct them in post.
Final checklist
Before approving a day-for-night shot, ask:
- Does the sky support the claimed time of day?
- Are the sun direction and reflections controlled?
- Where does the visible light come from?
- Are warm practicals localized and believable?
- Are shadows dark but still useful?
- Do faces, hands, and clothing remain natural?
- Does the shot match its neighboring angles?
- Do masks and color adjustments hold during movement?
- Is the blue color restrained enough to feel like light rather than a filter?
- Does the result still work at the final delivery size?
Conclusion
Day-for-night succeeds when the image stops behaving like daylight. The sky becomes darker, the ambient level falls, practical lights gain importance, shadows retain controlled detail, and the color relationship changes without turning everything blue.
Start with a source that can accept the transformation. Correct exposure and white balance first. Control the sky, preserve faces, and motivate warm and cool sources. Use masks and compositing when a global grade cannot hide daylight cues. In AI prompts, describe the night light, practical sources, shadow behavior, and continuity requirements instead of asking only for a dark cinematic image.
A believable night scene is built from relationships. Darkness, color, light sources, and detail all need to agree. When they do, the audience accepts the time of day without thinking about the conversion.
Related Articles
- Color Correction vs Grading Guide
- Contrast and Saturation Guide
- Color Temperature Guide
- Skin Tone Guide
- Teal and Orange Guide
- Exposure Guide
- Natural vs Motivated Light Guide
- Key, Fill, and Back Light Guide
- Lighting Prompts Guide
- Shot Matching Guide
Tools & Resources
- Day-for-Night Grading Checklist
- Sky Replacement Planning Sheet
- Night Lighting Reference Chart
- AeliaVision Color Palette Planner
Continue reading
Further insights from the Journal

Have a story in mind?
Bring your next project into focus.
Tell us what you are creating and what you want the audience to feel.