The story in brief
Build a complete AI film pipeline from story and shot planning through image and video generation, editing, sound, color grading, continuity, and export.
Inside this story
The most dangerous thing you can do in AI filmmaking is mistake a beautiful frame for a film.
Beautiful frames are easy. Type a prompt, wait three seconds, watch something extraordinary appear on your screen. But a film is not one frame. It is a hundred decisions arranged over time about character, camera, light, sound, silence, and the shape of emotion. Without a pipeline, you are not making films.
You are collecting images.
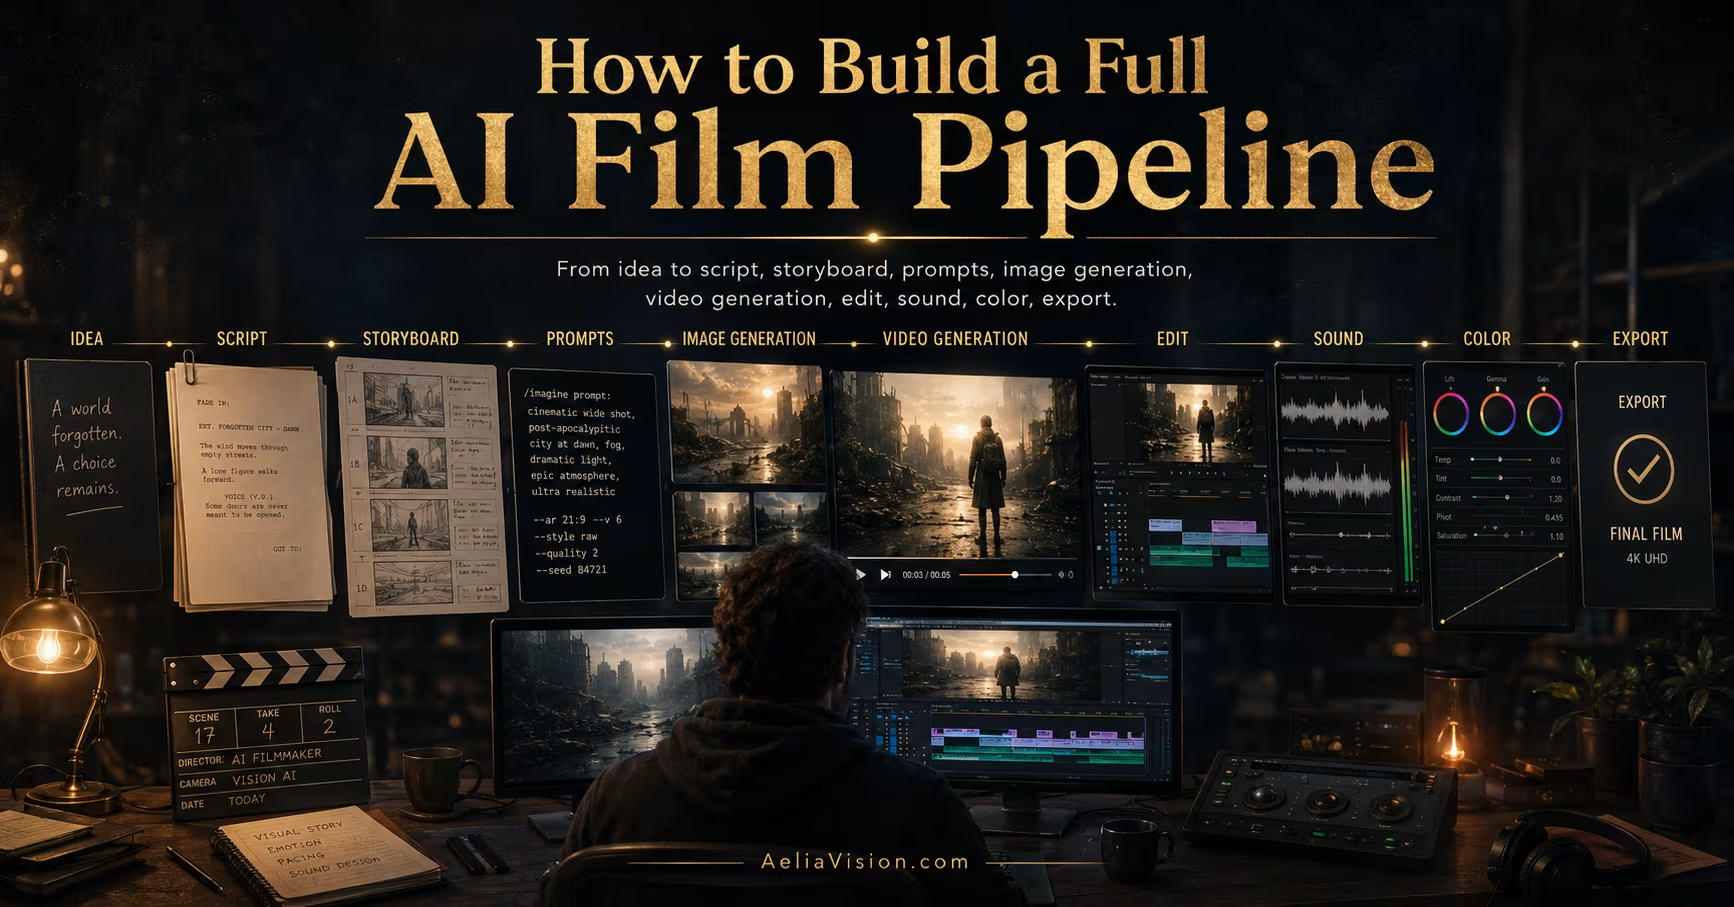
A full AI film pipeline takes an idea through every stage of production: concept development, scriptwriting, shot planning, storyboarding, image generation, video generation, editing, sound, color grading, and final export. Each stage supports the next. Each decision is intentional. The goal is to turn individual shots into a complete cinematic experience.
What is an AI film pipeline?
Table of contents
An AI film pipeline is a structured production workflow that uses AI tools across every stage of filmmaking. Instead of treating each prompt as a separate experiment, the pipeline organizes the entire film into a deliberate process.
A strong pipeline answers the questions most AI filmmakers skip entirely:
What is this story really about? Who are the characters and what do they want? What does every scene feel like from the inside? What does the camera do, and why? What sounds make this world real? What does the final cut do to an audience?
When these decisions are made before generation begins, AI tools become part of a professional production system. Without them, they remain expensive toys.
Stage 1: start with the core idea
Every strong film begins with a deceptively simple question: what is this story really about?
Not the plot. The emotion. Before you write a single prompt, generate a single image, or open a single tool, you need to answer that question in one sentence.
Consider the difference:
“A princess protected by a magical suit of armor.”
That is an image. It could be the thumbnail for a thousand different videos.
“A grieving princess is protected by an enchanted guardian built from her mother’s final act of love.”
That is a film. It contains loss, sacrifice, transformation, and a visual metaphor that can carry an entire story. That second sentence already tells you what the armor means, why it matters, and what the audience should feel in the last shot.
This is your foundation. Every prompt you write, every shot you generate, every cut you make it all serves that sentence.
At this stage, resist complexity. A story with a strong emotional centre and a single clear conflict is far easier to execute through AI tools than one with five locations, three subplots, and a twist. Strong AI films are often focused rather than elaborate.
Stage 2: develop the story and script
Once the idea is clear, structure it. Even a three-minute AI film needs a beginning, a middle, and an end and more importantly, it needs to earn each one.
For short films, three movements are enough:
| Story Section | Purpose |
|---|---|
| Opening | Introduce the world, the character, and the wound |
| Middle | Escalate the conflict or reveal the transformation |
| Ending | Deliver the emotional payoff, the twist, or the image that stays |
The script does not need to be long. It needs to be honest about what each scene is doing.
Write cinematically. AI tools do not read subtext they respond to visual specificity. Vague scripts produce vague generations.
Compare:
“A man walks into a room and sees something scary.”
Versus:
“A man enters the abandoned hospital room. The flickering ceiling light reveals an empty bed, a cracked mirror, and a child’s drawing pinned to the wall. He stops breathing when the drawing slowly moves by itself.”
The second version is not more descriptive. It is more specific and specificity is the only currency that buys a good AI generation.
For AI filmmaking, every scene in the script should answer three questions before you move on: What does the audience see? What do they feel? What do they now know that they did not before? If a scene cannot answer all three, it is not ready to generate.
Stage 3: create character and environment DNA
The most common failure in AI filmmaking is not bad prompting. It is inconsistency.
A character’s face shifts between shots. The costume changes. The location loses its architecture. The illusion breaks and once broken, an audience rarely forgives it.
The solution is not more skilled prompting. The solution is DNA.
Character DNA is a fixed, reusable description of everything that defines a character’s visual identity: appearance, clothing, age, body type, facial structure, emotional presence. This block travels with every shot in which that character appears. You do not reinvent it. You copy it.
Example The Guardian Armor:
A tall, ancient ceremonial suit of silver armor with elegant rose-shaped engravings, a glowing red crystal heart embedded in the chest, heavy knight-like shoulders, graceful feminine design influence, weathered metal texture, and a silent protective presence.
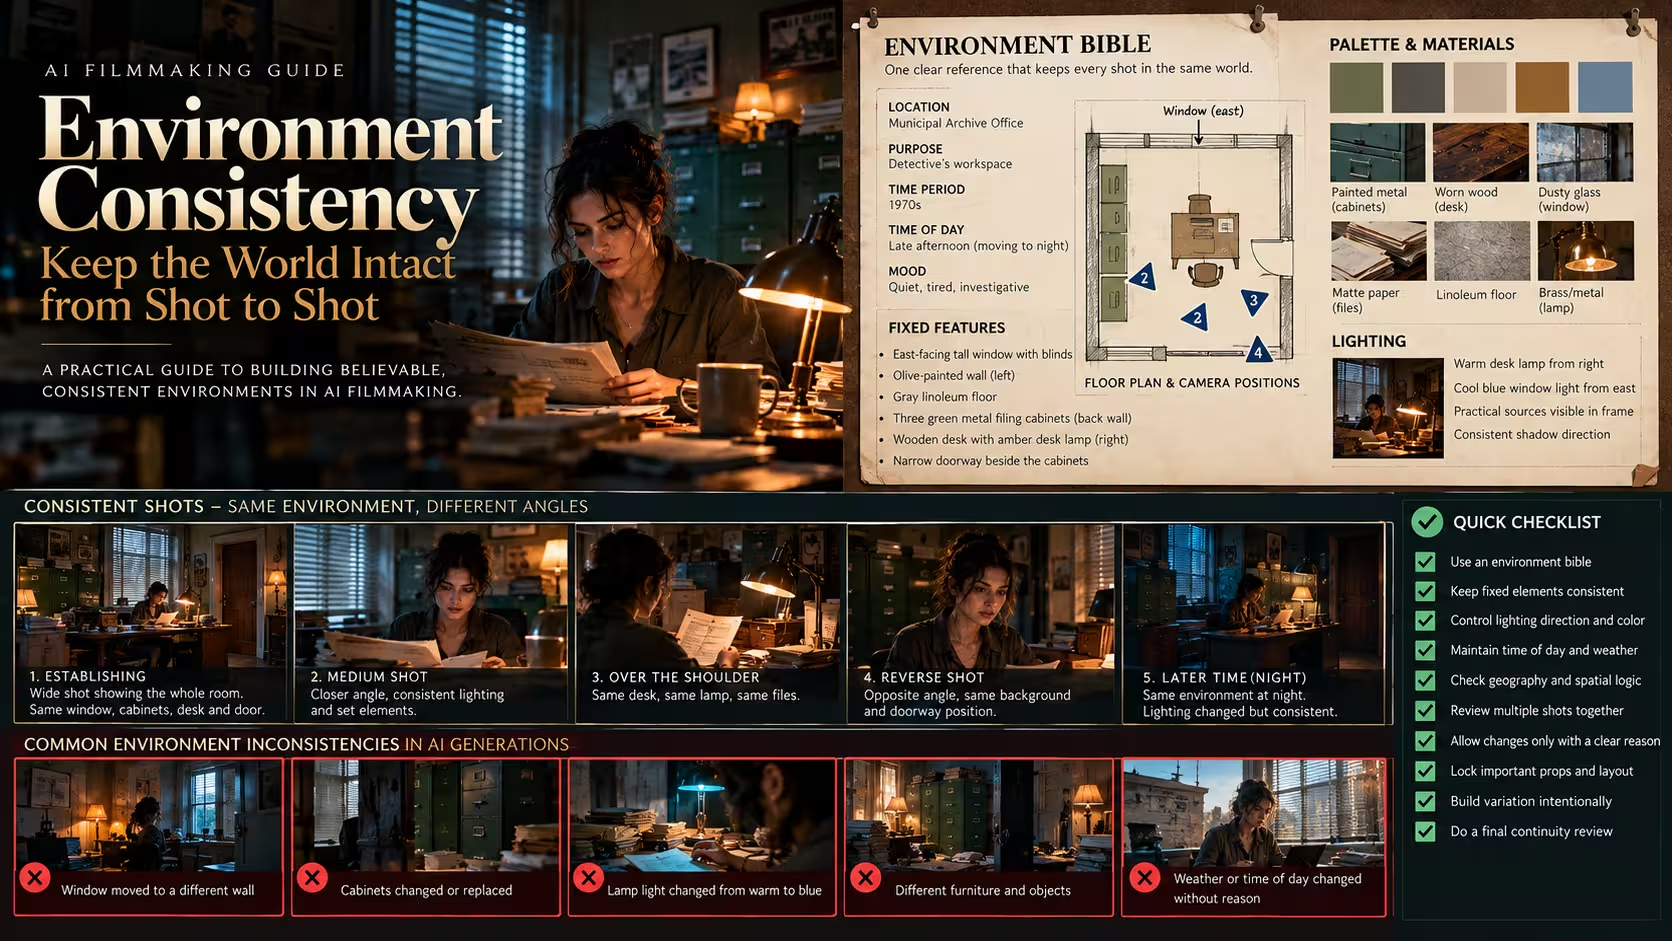
Environment DNA works identically:
Example The Throne Hall:
A vast white-stone royal chamber with tall arched windows, faded red banners, polished marble floors, golden sunlight, long shadows, and a quiet atmosphere of grief and lost power.
These blocks are not descriptions. They are contracts. Every generation must honour them.
Build one DNA block per character and one per major location before generating anything. Keep them in a single reference document. Copy from that document do not retype from memory.
Stage 4: break the story into scenes and shots
After the script is complete, the real production begins: the shot list.
This is where most AI filmmakers separate themselves from amateur prompt collectors. Instead of generating random beautiful imagery, you generate with intent. Every shot has a number, a subject, a duration, a camera angle, a lens, a movement, a purpose.
| Shot Element | Why It Matters |
|---|---|
| Shot number | Keeps the production organized |
| Duration | Plans pacing and edit rhythm |
| Subject | Defines who or what appears |
| Action | Specifies the visual event |
| Camera angle | Controls power, emotion, perspective |
| Lens choice | Shapes depth, intimacy, scale |
| Movement | Defines cinematic energy |
| Lighting | Supports mood and realism |
| Story purpose | Explains why the shot exists |
The last column is the most important. If you cannot explain why a shot exists, cut it before you generate it.
Shot types and when to use them in AI filmmaking
Not all shots carry the same emotional weight and not all of them behave the same way when handed to an AI video model. Before creating your shot list, understand the fundamental vocabulary of screen language.
| Shot Type | Description | Best Used For | AI Behaviour |
|---|---|---|---|
| Extreme Wide (EWS) | Character tiny in vast environment | Opening worlds, establishing scale, isolation | AI handles these well; rich environmental detail fills the frame naturally |
| Wide Shot (WS) | Full character visible in setting | Scene establishment, entrances, exits | Good for locking character DNA; full costume is visible and verifiable |
| Medium Shot (MS) | Waist up | Dialogue, character interaction, exposition | The most reliable shot type for character consistency across generations |
| Close-Up (CU) | Face and shoulders | Emotion, revelation, reaction | Strongest for performance; face DNA is most critical here enforce it strictly |
| Extreme Close-Up (ECU) | Eyes, hands, specific objects | Tension beats, thematic emphasis | Can drift easily in AI; always use a strong reference frame |
| Over the Shoulder (OTS) | Behind one character facing another | Dialogue exchanges, power dynamics | Generate each character’s perspective separately for best consistency |
| Point of View (POV) | Camera as a character’s eyes | Immersion, threat reveals, intimacy | Excellent in AI; removes character DNA complexity from the equation entirely |
| Low Angle | Camera below subject looking up | Power, threat, heroism, scale | Works very well for dramatic character moments in AI generation |
| High Angle | Camera above subject looking down | Vulnerability, surveillance, emotional diminishment | Strong for environment reveals and moments requiring the character to feel small |
| Dutch Tilt | Camera tilted on its axis | Unease, disorientation, psychological tension | Use sparingly; AI models sometimes amplify the tilt unpredictably across the clip |
A balanced shot list moves through multiple types per scene. An entire scene built from medium close-ups will feel monotonous regardless of how good each individual generation is. Vary the language. Give the editor contrast to work with.
Stage 5: build the visual language
A frame communicates feeling before the audience understands why.
This visual language is the system of camera behaviour, composition logic, lighting style, lens vocabulary, and colour palette that gives a film its emotional identity. Define it before generating a single image.
A fairytale might use warm golden light, symmetrical compositions, slow camera drift, and close-ups that feel like a whisper. A dystopian thriller might favour cold blue-green shadows, wide desolate spaces, handheld tension, and a colour grade that makes flesh look like concrete.
These choices are not decorative. They are the difference between a film that moves people and a collection of individually beautiful images.
Let the visual language evolve with the story. If your film moves from innocence to grief, the frames should feel that journey warm and open at the start, colder and tighter by the end. The audience should not be able to point to exactly when the shift happened. They should only notice that it did.
Stage 6: create storyboards
Storyboards are your promise to the video model.
Before generating footage, plan the visual rhythm of every shot: the opening frame, the key movement beats, the emotional peak, the closing frame. You do not need a polished illustration a rough AI-generated sketch or a written frame-by-frame breakdown is enough. What matters is that the shot has a path before the model starts moving.
A 4-second shot, planned:
| Panel | Visual Beat |
|---|---|
| Panel 1 | Character stands alone in darkness |
| Panel 2 | Candlelight flickers across the face |
| Panel 3 | Character hears something behind them |
| Panel 4 | Their eyes widen |
| Panel 5 | Camera pushes closer |
| Panel 6 | A shadow appears on the wall |
Without this plan, the model invents its own path. Sometimes it chooses well. Most of the time, it doesn’t.
The storyboard also solves an editorial problem before it becomes one: when you know the closing frame of a shot, you know how it cuts to the next one. Plan the exit before you generate the entrance.
Stage 7: generate key images
Key image generation is the foundation of your visual pipeline. Get it wrong here and everything downstream suffers. Get it right and video generation becomes almost effortless.
In 2026, three models lead for cinematic still-frame work:
- Midjourney: test the current version for cinematic key art, concept frames, and mood-driven visuals.
- FLUX: test current versions for realistic environments, character portraits, and production-design references.
- Adobe Firefly Image 3 the safest option for commercial productions, trained entirely on licensed content with clean IP status.
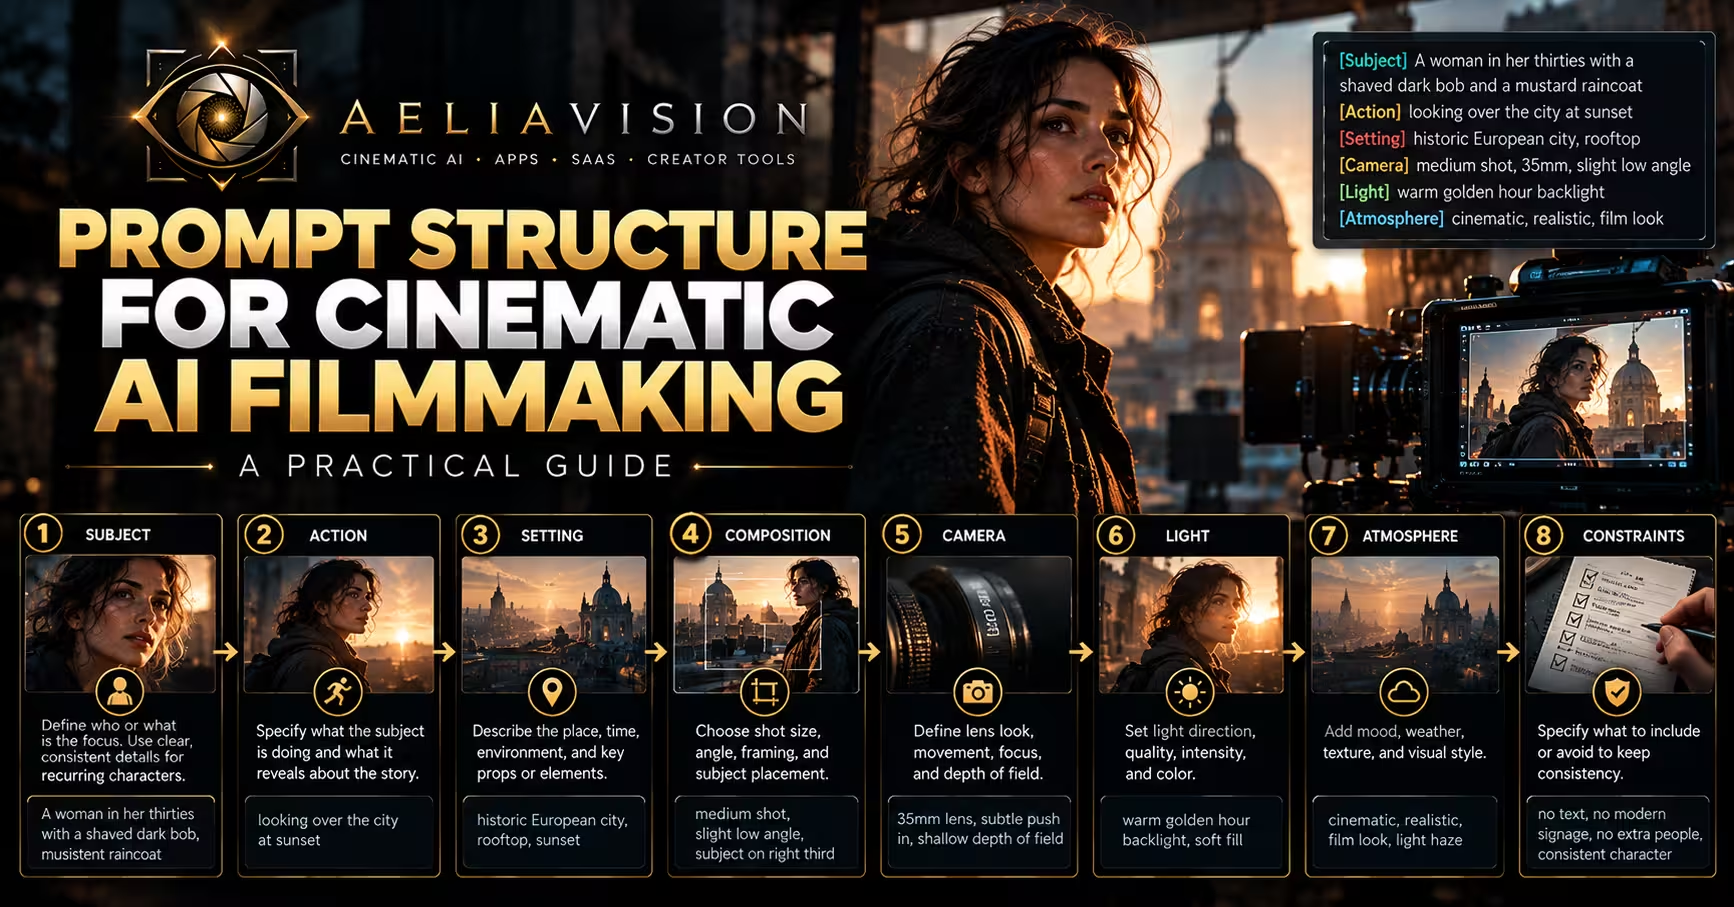
A strong image prompt should specify:
| Prompt Component | Example |
|---|---|
| Subject | A grieving queen holding a cracked crown |
| Environment | Empty throne room with broken banners |
| Camera | Wide cinematic frame, low-angle perspective |
| Lighting | Cold moonlight mixed with fading candlelight |
| Mood | Defeated, silent, tragic |
| Style | Photorealistic cinematic realism |
| Technical detail | 35mm lens, shallow depth of field, film grain |
Avoid the phrase “make it cinematic.” Describe what makes it cinematic: the light source, the lens, the composition, the emotional weight. That is your job. The model handles the execution.
Useful AI film images feel like frames from the intended movie rather than unrelated posters or concept art. Prompt specificity helps close that gap.
How to choose your video generation model
No single AI video model wins every shot. Each tool has a distinct strength profile and choosing the wrong model for the shot type is one of the most common and most fixable production mistakes in AI filmmaking.
Think of the models as a roster of specialists, not a hierarchy. You would not shoot every scene with a telephoto lens. You do not generate every shot with the same model.
Here is how to route your shots in 2026:
| Shot Scenario | Primary Model | Why | Fallback |
|---|---|---|---|
| Realistic human motion and physical performance | Kling | Test physical accuracy, human motion, temporal consistency, and reference adherence | Seedance |
| Dialogue-driven scenes with spoken performance | Google Veo | Test current audio integration, lip-sync, spoken delivery, and reference adherence | Runway |
| Character consistency across multiple takes | Seedance | Test character identity across multiple takes and camera changes | Kling |
| Precise camera moves: push, pan, tilt, orbit | Runway | Compare current regional motion and camera controls with the shot list | Kling |
| Atmosphere, landscape, environment, nature | Luma Ray | Test colour, atmospheric motion, and composition against project references | Kling |
| Fantasy creatures and non-human subjects | Kling | Test non-human anatomy, motion, and consistency before committing to a sequence | Seedance |
| Architecture and object-focused shots | Runway | Test structural stability and background drift with the project references | FLUX for stills |
The three-model workflow
Most professional AI film productions in 2026 use a core three-model setup rather than a single tool:
Choose one tested model for character-led shots, one for environment and atmosphere, and one for dialogue or precision camera work. Keep the assignments consistent across the production.
This structure keeps colour grading decisions manageable. Every model has a distinct output signature: contrast levels, colour temperature bias, motion blur characteristics. Mixing five models in a single scene creates a colour grading problem that no LUT can fully resolve.
When budget allows only one model, run the same representative character, environment, dialogue, and movement tests in each candidate. Choose from those results rather than a general ranking.
Stage 8: generate video from images
Once your key images are locked, animate them.
Image-to-video is almost always superior to text-to-video for narrative work. The first frame already carries your character DNA, your environment, your lighting, and your composition. You are not asking the model to invent a world you are asking it to move through one you have already designed.
Write your video prompt around what needs to move not what already exists in the image. Then add what needs to not happen:
The camera slowly pushes toward the character as candlelight flickers across their face. Breathing becomes shallow. The background holds still. Dust drifts through the light. The character turns their eyes toward the sound. Slow, controlled cinematic movement. No costume change. No new characters. No sudden camera spin.
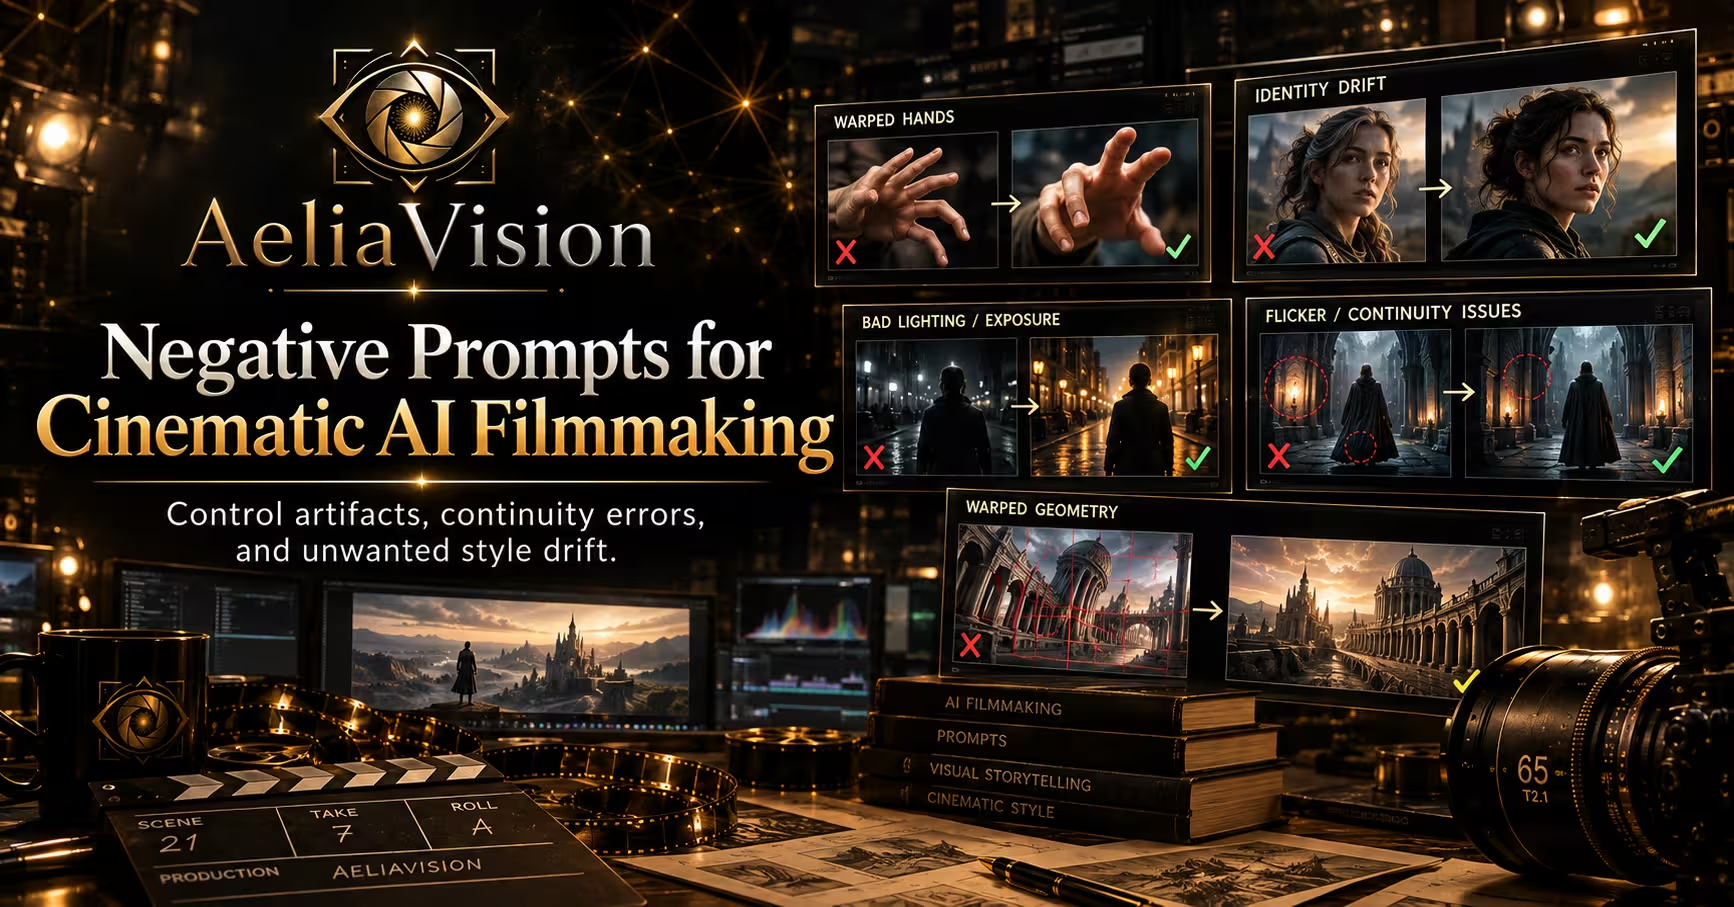
Those negative instructions are not optional. Without them, the model will improvise. Models improvise badly.
Generate multiple takes. Treat the AI like a camera operator expect to shoot until you find the right performance.
When the generation goes wrong
Even with strong reference images and well-structured prompts, AI video generation fails in predictable ways. Recognising these failure modes early saves hours of wasted regeneration.
| Problem | Likely Cause | Fix |
|---|---|---|
| Character’s face changes mid-shot | Weak or absent character DNA in the prompt | Add full character DNA at the start of every video prompt as well as in the reference image |
| Background melts or shifts during the shot | Model interpreting the scene too loosely | Add explicit stability instruction: “background holds still, no environment drift” |
| Extra limbs or body distortion appears | Complex pose overloading the model’s physics | Simplify the action; split one complex shot into two simpler consecutive shots |
| Costume changes colour or disappears | Model deprioritising clothing detail | Specify costume explicitly in the prompt even when it is visible in the reference image |
| Camera movement is too fast or jerky | Vague movement instruction | Replace general language with specific: “slow 2-second push,” “gentle lateral drift at walking pace” |
| Shot cuts off before the action completes | Described action takes longer than the default clip length | Shorten the described action, or manually increase the target duration in model settings |
| Unwanted objects appear in the frame | Model hallucinating environmental detail | Add: “no additional characters, no objects not present in the reference frame” |
| Skin tone shifts noticeably between frames | Lighting instruction is too vague | Specify light source, direction, and temperature: “warm candlelight from camera-left, constant intensity” |
The rule of thumb: if the model keeps failing the same shot across three or more takes, the problem is the prompt or the reference image not the model. Change one variable at a time and regenerate.
Stage 9: edit the film
This is where the film is actually made.
Everything before this moment was preparation. The edit is the decision about which moments breathe and which ones cut, about when the audience receives information and when they are made to wait, about the rhythm that determines whether a scene lands or dissolves.
A collection of beautiful AI clips is not a film. It is material. The editor makes it a film.
| Editing Element | Purpose |
|---|---|
| Shot duration | Controls rhythm and pacing |
| Cut timing | Creates emotional impact |
| Continuity | Keeps space and action clear |
| Transitions | Connects ideas or shifts mood |
| Visual contrast | Prevents fatigue |
| Silence | Builds tension and weight |
The hardest discipline in editing AI films: cut the shot you love if it does not serve the story. It is always the shot you generated in the first take, the one you spent forty minutes on, the one that is objectively beautiful. Cut it anyway if it does not belong.
Start rough. Place every clip in story order with no regard for timing, then step back and watch it as an audience would. The edit that needs to happen will make itself obvious.
Stage 10: add sound design
Most AI films fail at this stage not because the sound is bad, but because there is no sound design at all. Only music.
Music is easy. Sound design is work. And sound design is what separates an AI film from an AI slideshow.
Footsteps on marble. The creak of an armour joint. The silence before a sword is drawn. A distant bell tolling through an empty throne room. These sounds cost nothing to find and add everything to the frame.
Think in layers:
| Sound Layer | Example |
|---|---|
| Atmosphere | Wind, room tone, distant city, forest insects |
| Foley | Footsteps, cloth movement, armour creak, paper |
| Impact sounds | Door slam, sword hit, explosion, glass break |
| Emotional texture | Low drones, pulses, whispers, distant echoes |
| Music | Theme, tension bed, emotional score |
A quiet breath before a reveal can carry more weight than any score cue. Use silence the way a composer uses rests as part of the rhythm, not the absence of it.
Build the sound in the same order as the layers above. Atmosphere first, always. A scene with strong room tone but no music already feels alive. A scene with music but no atmosphere feels hollow no matter how beautiful the score.
Stage 11: voice, dialogue, and narration
If your film carries words spoken dialogue, narration, a character’s final line treat voice as performance, not delivery.
The line must be written for the ear, not the page. Text that reads beautifully often sounds mechanical when spoken aloud. Shorter phrases. Natural pauses. Deliberate silence between thoughts.
Compare:
“She knew that the kingdom was gone and that nothing would ever be the same again.”
Versus:
“The kingdom was gone. And deep inside… she knew. Nothing would ever be the same.”
The second version is not more poetic. It gives the breath between the words the same weight as the words themselves.
Writing for performance: breath, emphasis, and silence
Beyond rhythm and pacing, professional voice writing requires thinking about three things the page cannot show: breath, emphasis, and silence.
Breath placement tells the performer where the emotional weight of a sentence lands. In written form, you signal it through punctuation and line breaks. Each line break is a breath. Each short paragraph is a beat. The white space is not empty it is direction.
Emphasis placement determines which word carries the most weight in each sentence. In AI voice generation, this is controlled through sentence construction rather than markup.
Compare:
“I will not leave you behind.” the full sentence carries equal weight.
Versus:
“Whatever happens. I will not leave you behind.” the short opening sentence creates pressure that the resolution must release.
Silence as punctuation is a powerful, often underused tool. A stage direction of (pause) or (three seconds of silence) before a major emotional beat instructs the AI voice model to stop. Two seconds of nothing before a line lands harder than two seconds of the best music.
A complete voice script notation might look like:
“The kingdom is gone. (three-second pause) And deep inside… (breath) she knew. (long pause) Nothing would ever be the same.”
This is not overwriting. This is directing. Before generating voice, rewrite every line for spoken rhythm. Then generate. Then revise. Treat voice like every other production stage it earns multiple takes.
Stage 12: color grade the film
AI-generated clips arrive from different models, different sessions, different lighting conditions. Without colour grading, your film looks like exactly what it is: a collection of generated material.
With it, the film looks like it was shot on purpose.
Correct before you grade. Match exposure, white balance, and contrast across shots before applying any creative look. Then find the palette that serves the story.
| Film Style | Color Direction |
|---|---|
| Fantasy fairytale | Warm golds, soft highlights, gentle contrast |
| Horror | Cool shadows, low saturation, controlled darkness |
| Sci-fi | Steel blues, cyan highlights, clean contrast |
| War epic | Dusty yellows, deep shadows, muted greens |
| Royal drama | Rich gold, deep red, polished contrast |
Do not overgrade. Heavy colour manipulation can damage generated detail. A restrained color grade should support the mood without drawing attention to itself.
Stage 13: add titles, graphics, and final polish
Titles are the last thing the audience sees and the first thing they judge. Choose typography that feels like it belongs to this world.
A mythological epic uses engraved serif letterforms. A sci-fi story uses spare geometric type with precise spacing. A horror film uses type so minimal it feels like a warning.
Final polish:
| Polish Element | Purpose |
|---|---|
| Film grain | Unifies AI footage; adds texture and age |
| Subtle blur or sharpening | Controls digital harshness |
| Stabilisation | Removes unwanted motion artefacts |
| Speed ramps | Elevates key moments |
| Letterboxing | Creates a cinematic frame |
| Final audio mix | Balances dialogue, music, and effects |
Polish does not mean more. It means right.
Stage 14: export for the right platform
The same film, exported wrong, fails its audience.
Check the output on multiple screens phone, monitor, large display before you publish. Check with sound and without. Check at full brightness and in a dark room. What holds together everywhere is what is finished.
| Platform | Recommended Aspect Ratio |
|---|---|
| YouTube cinematic video | 16:9 |
| YouTube Shorts | 9:16 |
| TikTok | 9:16 |
| Instagram Reels | 9:16 |
| Instagram feed | 1:1 or 4:5 |
| Website hero video | 16:9 or custom wide crop |
A professional export is not only about resolution. It is about clarity, compression quality, audio balance, framing, and platform readability. Watch the final version in all four conditions before it goes live.
The professional AI film pipeline at a glance
| Stage | Goal |
|---|---|
| Idea | Define the concept and emotional core |
| Script | Build the story and scene structure |
| Character DNA | Lock visual continuity |
| Environment DNA | Lock world consistency |
| Shot List | Plan every cinematic unit |
| Visual Language | Define camera, lens, light, and colour logic |
| Storyboard | Pre-visualise the action and rhythm |
| Image Generation | Create key frames (Midjourney / FLUX) |
| Model Selection | Route each shot to the right generation tool |
| Video Generation | Animate shots (Kling, Google Veo, Seedance) |
| Editing | Shape pacing and story flow |
| Sound Design | Build realism, atmosphere, and emotion |
| Voice / Dialogue | Add performance and narrative clarity |
| Color Grade | Unify the film visually |
| Titles / Polish | Finish the cinematic presentation |
| Export | Deliver for the correct platform |
The production continuity checklist
Continuity is the invisible craft that holds an AI film together. When it works, the audience never thinks about it. When it breaks, they feel something is wrong even if they cannot say what.
Run this checklist at three points in production: before each generation pass, after each generation pass, and before the final export.
Before you generate any shot
- [ ] Character DNA block is copied verbatim into the prompt not paraphrased or summarised
- [ ] Environment DNA block is present for every shot in this location
- [ ] Shot card is complete: angle, duration, lens, movement, lighting, story purpose all specified
- [ ] Reference image matches the DNA across costume, face, and environment architecture
- [ ] Video prompt describes only movement and action no world-building already contained in the image
- [ ] Negative instructions are included for anything the model has previously invented uninvited
- [ ] Model selection matches the shot type (see Model Selection Logic above)
- [ ] Storyboard panel is approved for this shot
After you generate each shot
- [ ] Character face matches the reference image across the full clip, including the final frame
- [ ] Costume colour, texture, and accessories are consistent with character DNA throughout
- [ ] Environment architecture matches the location from all previous shots in this scene
- [ ] Camera movement matches the shot card specification in speed, direction, and duration
- [ ] No unwanted characters, objects, or elements have appeared in frame
- [ ] Clip length is sufficient for the intended cut with at least 10 frames of buffer on each end
- [ ] Motion quality is natural no stuttering, morphing, sudden speed changes, or frame drops
Before you export the final film
- [ ] Every character matches their DNA across all appearances throughout the entire film
- [ ] Locations are architecturally consistent within each scene regardless of how many generations were used
- [ ] Colour grade has been applied and all shots feel like they belong to the same film
- [ ] Audio levels are matched: dialogue, sound design, and music do not compete with each other
- [ ] Aspect ratio is correct for the target platform
- [ ] Letterboxing is consistent across all shots if used no shots accidentally full-frame
- [ ] Titles and graphics match the film’s typographic identity
- [ ] Final export has been checked on at least two different screen types before publishing
A failed check before generation saves one generation attempt. A failed check after generation saves one edit session. A failed check before export saves a public embarrassment.
Run the checklist. Every time.
Why random prompting is not enough
Random prompting can create extraordinary images. It cannot create a film.
A film requires continuity the same character across fifty different shots, the same location through different times of day, the same emotional logic sustained over minutes of screen time. Prompting randomly destroys continuity by design.
Without a pipeline, the problems are predictable: faces that shift between shots, costumes that change, locations that rebuild themselves, camera movements that belong to different films, sound that contradicts the image, and an edit with no rhythm.
The pipeline does not constrain the AI. It constrains the filmmaker’s own uncertainty. When you know what you want, the model knows what to give you.
The goal is not to let the AI decide everything. The goal is to direct AI with the same discipline used in traditional filmmaking and to hold it to the same standard.
AI filmmaking still needs a director
The tools do not have taste. They never will.
They can generate motion, voice, image, and music. They cannot feel the moment a scene becomes dishonest. They cannot hear when a cut is too early. They cannot choose which take is true.
That is the director’s work.
In AI filmmaking, the director becomes something new: part filmmaker, part system architect, part prompt engineer, part editor, part sound designer. The pipeline is not a creative constraint. It is a creative instrument. The more deliberate the system, the more freedom the director has to do the work that machines cannot.
The director decides what matters. The director protects the story. The director chooses the strongest take, rejects the wrong one, controls the rhythm, and shapes the final emotion. None of those decisions can be generated.
Build the pipeline. Direct the work. Trust the decisions.
Direct the whole pipeline
The future of AI filmmaking does not belong to those with the fastest computers, the most expensive subscriptions, or the cleverest prompts.
It belongs to those who understand story.
Story is the thing the tools cannot generate. The pipeline exists to serve the story to protect it from randomness, from inconsistency, from the seductive trap of a beautiful frame that leads nowhere.
Every stage in this guide from the first idea to the final export is an act of protection. You are protecting the emotional truth at the center of the work.
AI can generate the material. The filmmaker makes the experience.
That is the only thing that has never changed.
Continue reading
Further insights from the Journal
Have a story in mind?
Bring your next project into focus.
Tell us what you are creating and what you want the audience to feel.