The story in brief
A flat frame can contain beautiful light, expensive lenses, and a talented actor, yet still feel strangely thin. The problem is often not the camera. It is the arrangement of depth layers inside the shot.
Inside this story
A flat frame can contain beautiful light, expensive lenses, and a talented actor, yet still feel strangely thin. The problem is often not the camera. It is the arrangement of depth layers inside the shot.
Depth layering is the practice of organizing a scene into distinct spatial zones, usually a foreground, a middle ground, and a background. Those zones do not need to be sharply separated, and they do not need to contain a lot of objects. They need to relate to one another. A near curtain can frame a face. A figure in the middle distance can give the face a sense of scale. A patch of light in the background can guide the eye toward the action. When these pieces work together, a two-dimensional image suggests a world with distance, weight, and direction.
This guide explains how cinematographers use depth layers in practical terms. It covers blocking, lens choice, focus, lighting, production design, camera movement, common mistakes, and ways to plan a layered shot when the location or budget is limited. The goal is not to make every image busy. The goal is to give the viewer a clear feeling of where people and objects sit in relation to one another.
What depth layers actually do
A camera records a flat surface. The audience knows that the photographed room has volume because visual cues imply volume. Overlapping shapes tell us that one object sits in front of another. Relative size gives us a sense of distance. Atmospheric haze softens faraway details. Perspective makes parallel lines converge. Changes in focus and movement confirm that the image contains space rather than a collection of cutout shapes.
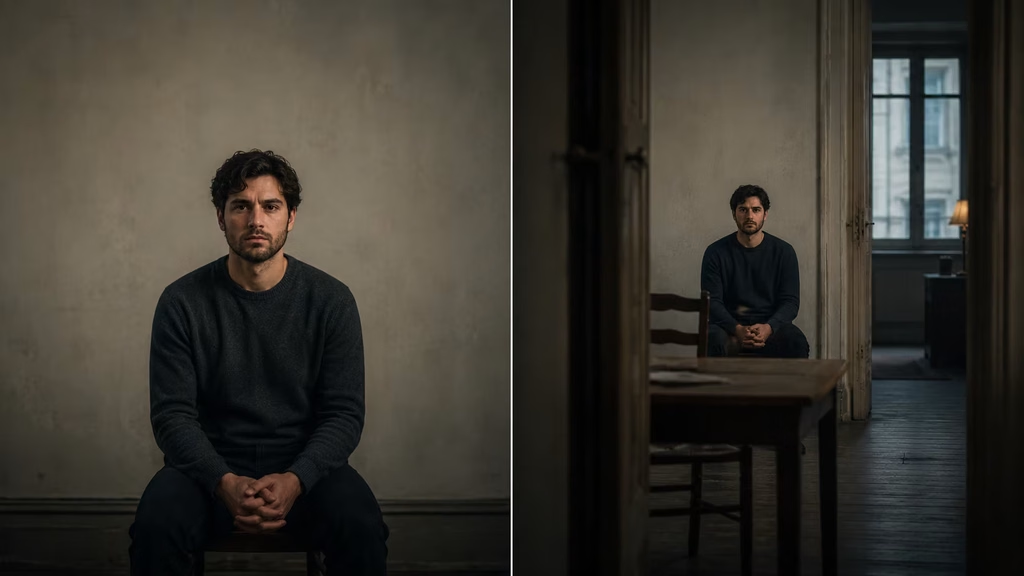
Depth layers gather these cues into an intentional composition. Consider a simple shot of a person standing in a kitchen. If the person fills the frame against a blank wall, the viewer receives information about the face and costume but very little about the room. Put a glass or hanging plant close to the lens, place the person beside the counter, and leave a doorway visible behind them. The shot now has overlapping planes. The foreground object may be soft, the person may be sharp, and the doorway may hold a smaller patch of light. The kitchen feels deeper even though the camera has not moved.
A layered composition can perform several jobs at once:
- It establishes the physical relationship between characters and their surroundings.
- It creates visual routes for the eye to follow.
- It separates subjects from a distracting wall or background.
- It gives blocking more expressive options.
- It lets light describe distance and mood.
- It can place information in the frame before the story calls attention to it.
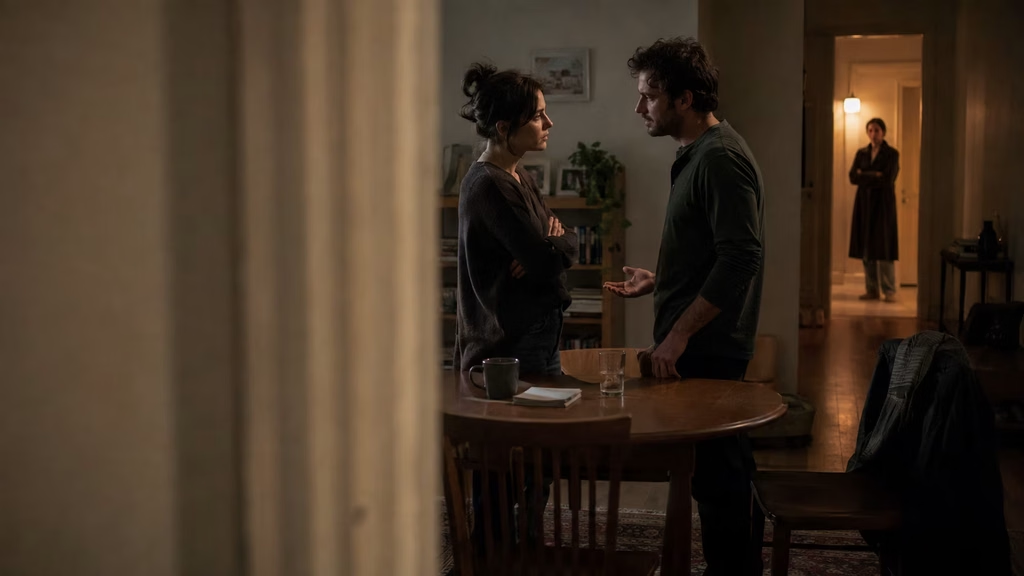
Depth is also a storytelling tool. A character hidden behind a foreground edge may seem watched, trapped, or excluded. A person isolated in the far background may look emotionally distant. Two characters placed in separate layers can share a frame while remaining visually divided. A slow push through a near object toward a subject can feel like entering private space. None of these effects comes from blur alone. They come from relationships between planes.
The three basic zones
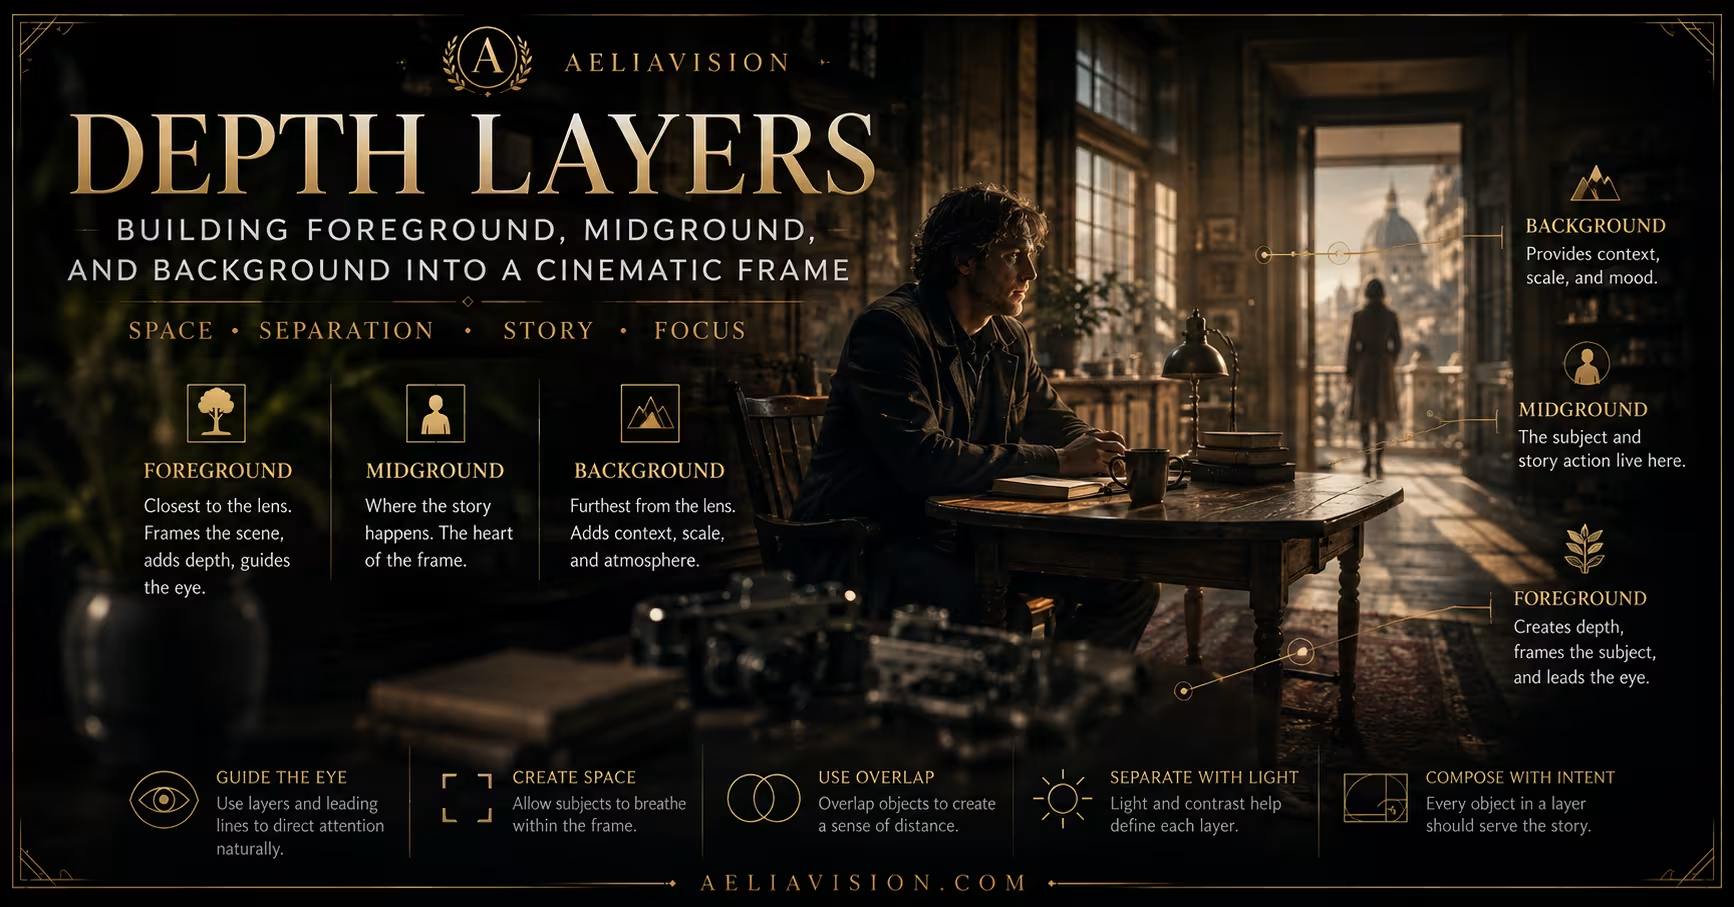
The classic model divides a shot into three zones: foreground, middle ground, and background. These labels describe distance from the camera, not importance. A background detail can be the most important story clue in the frame. A foreground object can be visually quiet even if it occupies a large portion of the image.
Foreground
The foreground is the space closest to the lens. It may include a wall edge, furniture, foliage, a doorway, a person passing close to camera, or a practical light. Foreground elements often appear large and partially cropped. That cropping is useful because it suggests that the world continues beyond the frame.
Foreground objects should have a reason to exist. A soft shape at the edge of the image can add depth, but random clutter can block faces, steal contrast, or make the shot feel staged. Before adding anything near the lens, ask what it contributes. Does it frame the subject? Create a visual obstruction? Establish the location? Carry a color or texture that helps the composition? If the answer is no, move it away or remove it.
A foreground layer does not have to be heavily out of focus. A sharp architectural edge can divide the frame. A reflection can act as a second foreground image. A shadow crossing the lens area can add a layer of light rather than an object. The important quality is proximity and its effect on the viewer’s reading of space.
Middle ground
The middle ground usually contains the main action. This is where the actor stands, where a conversation happens, or where the camera finds the object that matters most. The middle ground benefits from enough separation to remain readable. If it is crowded with competing patterns, the shot may have depth but no hierarchy.
Blocking becomes especially important here. A character can step forward into a pool of light, sit behind another character, cross from one layer to another, or remain fixed while the background changes around them. Small movements have greater meaning when the viewer can see the distances involved.
The middle ground is not always the sharpest plane. A cinematographer may hold a foreground object in focus while the actor stays soft, then shift focus as the actor notices something. In a wide shot, several middle-ground subjects can share focus if the light and color keep the composition organized.
Background
The background is the area farthest from the camera. It can provide context, contrast, or a second piece of action. A hallway, window, staircase, street, mirror, or open doorway creates depth with relatively little equipment. Even a plain wall can work if it has a change in tone, a shadow pattern, or a practical source that gives it a separate plane.
A good background has controlled information. It should tell the viewer enough to understand the space without competing with the story beat. Background extras, moving vehicles, signs, and bright windows can easily pull attention away from the subject. The question is not whether the background is interesting. The question is whether its interest arrives at the right moment and at the right strength.
Start with blocking, not the lens
Many depth problems are really blocking problems. A wide lens cannot invent meaningful distance if every person is standing on the same line. A shallow depth of field cannot create spatial relationships if the background is an empty blur. Start by placing people and important objects at different distances from the camera.
Walk the scene before setting the camera. Identify the nearest useful edge, the main action area, and the deepest part of the location that can remain visible. Then test simple arrangements. Put one actor near a doorway and another several feet closer. Place a table between the lens and the conversation. Let one character occupy the background while another listens in the foreground. Watch how the relationships change when the actors move only a step or two.
Depth layering works best when distance affects behavior. If a character is supposed to overhear a conversation, the background position should make that possible. If someone is hiding, the foreground obstruction should plausibly conceal them. If two people are separated emotionally, the spatial separation can support the performance rather than decorate it.
Lens choice and perceived distance
Lens choice changes how depth is recorded, but it does not replace depth in the scene. A wide lens exaggerates the apparent distance between near and far objects when the camera is close to the subject. A longer lens compresses those distances, making layers appear closer together. Both approaches can be useful.
With a wide lens, a foreground object may become large while the background recedes quickly. The result can feel immediate, unstable, or physically immersive. The camera must be placed carefully. A small move toward a face can become aggressive, and a near hand or prop can look much larger than expected. Wide lenses also reveal more of the location, so production design and lighting must be controlled across a larger field.
A longer lens narrows the field of view and compresses space. It can stack a distant face behind a nearer shoulder, or make a street appear densely packed. Compression can suggest surveillance, pressure, or a lack of escape. It also makes the camera less physically involved in the scene. The viewer may feel like an observer rather than a participant.
Normal focal lengths often offer a useful middle position. They preserve a believable sense of space without exaggerating every distance. The best choice depends on the emotional and physical relationship you want the viewer to feel. Do not choose a lens because a certain focal length is supposed to create depth. Choose the camera position and lens together, then judge the actual arrangement through the viewfinder or monitor.
Perspective is mostly camera position
A common misconception is that wide lenses automatically create a deep image. The stronger factor is camera position. When you move the camera close to a foreground object, the object changes size relative to the background. That relative size shift is perspective. Changing lenses while keeping the subject’s framing and camera position can alter the field of view and distortion, but it does not produce the same perspective change as moving the camera.
This distinction matters on set. If the foreground and background feel too similar in scale, first consider moving the camera or changing the distance between the layers. A lens swap may solve the problem, but it may also create unwanted distortion or force a new composition. Take a quick photograph or phone reference from the camera position. Compare the distance between layers, not only the amount of blur.
Focus as a depth cue
Focus tells the audience where to look, but focus also describes the distance between planes. A shallow focus shot can separate a subject from the background. A deeper focus shot can let the audience read several layers at once. Neither approach is automatically more cinematic.
Shallow focus works when the focus choice has a clear purpose. The viewer should understand why a near object is soft, why the actor is sharp, or why attention moves from one plane to another. If every shot reduces the background to a wash of circles, the location loses its identity and the depth design becomes repetitive.
Deep focus can be demanding because the frame must work in detail. Lighting, production design, makeup, wardrobe, and blocking all remain visible. The reward is a shot where the audience can choose what to examine. This is particularly useful when two actions happen at different distances or when a background reveal needs to remain visible while the foreground continues.
Focus pulls between layers
A rack focus shifts attention from one distance to another. The move can connect two characters, reveal a clue, or change the meaning of an object. The focus pull should be motivated by the story or by a visible change in attention. A technically smooth pull that has no dramatic reason often feels like a demonstration of equipment.
Plan the pull with the focus team and the actors. Mark the exact distances, check the amount of light available at each plane, and decide whether the transition should be quick or gradual. If the foreground object is very close, even a small focus error can become obvious. Test the move at the intended frame rate and aperture, especially when working with a large-format sensor.
When a focus pull is not reliable, the composition can still work. Use contrast, movement, or a change in light to move the eye. A background figure stepping into a brighter area may attract attention without requiring a focus shift. Good depth design gives you more than one way to guide the audience.
Light each layer as a separate space
Lighting depth does not mean placing a light on every plane. It means giving the planes different values, colors, textures, or levels of activity. If foreground, subject, and background all receive the same exposure and color, they may merge even when they are physically separated.
Begin with the subject. Establish the exposure and the direction of the key light. Then look behind the subject and decide whether the background should sit darker, brighter, warmer, cooler, or close to the subject’s tone. A small practical lamp in the distance can create a point of depth. A window with controlled daylight can separate the far wall. A strip of shadow can show the shape of a corridor.
The foreground often works best when it is less legible than the subject, but it should retain enough shape to read as near space. A dark foreground edge against a lighter middle ground creates a natural frame. A bright foreground object may work if the story wants the viewer to notice it first, but it can easily become the shot’s unintended subject.
Atmospheric perspective is another option. Haze, smoke, dust, rain, or natural mist can soften distant contrast. Use restraint. Heavy haze can flatten the image by coating every plane in the same veil. The effect is most useful when the density changes with distance or when a beam of light reveals a far layer.
Color can separate layers without making the image look artificial. A cooler window area behind a subject may suggest exterior space. A warmer practical in the foreground may create intimacy. Keep an eye on skin tones and color contamination. The audience should feel the distance before noticing the color strategy.
Production design that creates distance
Production design supplies the objects that make layers visible. You do not need a large set. A narrow room can feel deep if its lines, openings, and objects lead away from the camera.
Doorways are especially useful because they create a frame within the frame. A doorway in the background can show another room, a slice of corridor, or a character waiting outside. Windows provide a second plane and a source of light, but watch reflections and blown highlights. Mirrors can double the apparent space, though they require careful camera and crew placement.
Furniture can define distance. A chair close to camera gives the eye a near reference. A table separates the actors from the lens. Shelves and hanging objects add vertical layers, while floor patterns and ceiling lines create perspective toward the background. Use objects with different shapes and scales. If every layer contains the same size and texture, the frame may still look flat.
Production design should support the lens rather than fight it. A wide shot sees more clutter, more empty corners, and more ceiling. A long lens compresses background objects, so repeated patterns can become distracting. Check the actual camera frame as the set is dressed. The room that looks balanced in person may contain a bright object directly behind an actor’s head.
A useful test is to remove the subject temporarily and study the empty frame. Can you tell where the camera is, where the room ends, and which path the eye takes? If not, adjust the background before relying on the actor to hold the composition together.
Movement through depth
Camera movement makes depth especially visible because near and far objects shift at different speeds across the frame. A lateral tracking move can create strong parallax. A nearby post may sweep past quickly while a distant wall drifts slowly. The difference in speed confirms the spatial arrangement.
A dolly toward a subject can reveal successive layers. The camera may pass a doorway, move around a foreground figure, and arrive at a face. This creates a physical feeling of entering the scene. The move does not have to be elaborate. Even a short push becomes more expressive when the composition contains something near the lens and something beyond the subject.
A pan can also reveal depth. Start with a foreground obstruction, then pan to uncover a middle-ground action and a distant detail. The viewer experiences the space in sequence. The timing of the reveal matters. If the camera moves too quickly, the layers become a blur. If it moves too slowly, the setup can feel self-conscious.
Handheld movement changes the relationship differently. Small shifts in the frame can make near objects feel close to the operator and distant objects feel less stable. This may suit a scene of confusion or urgency. Keep enough spatial information for the audience to understand what is happening. Chaotic movement does not automatically create immersion.
Parallax can be created without a moving camera. Let a foreground actor cross close to the lens while a second actor remains farther away. A rack focus can then transfer attention between them. A passing shadow, vehicle, or reflection can produce a similar layered change.
Using people as living layers
Actors can provide the strongest depth cues because the audience reads faces and bodies quickly. A foreground shoulder can frame a listener. A figure in the background can remain still while the main actor crosses in front. Two people can share the frame at different distances, making their relationship visible without cutting to separate close-ups.
Be precise about sightlines. If the foreground actor blocks too much of the middle-ground actor, the audience may miss the performance. If the foreground body is too soft and too large, it may become an anonymous wall. Small adjustments in height, angle, and distance can preserve both depth and expression.
Layered staging is useful for group scenes. Instead of lining everyone up across the same plane, create diagonals. One character can sit near the camera, another can stand behind the table, and a third can occupy a doorway. The arrangement gives the scene a visual rhythm and lets the director shift attention through movement or eyelines.
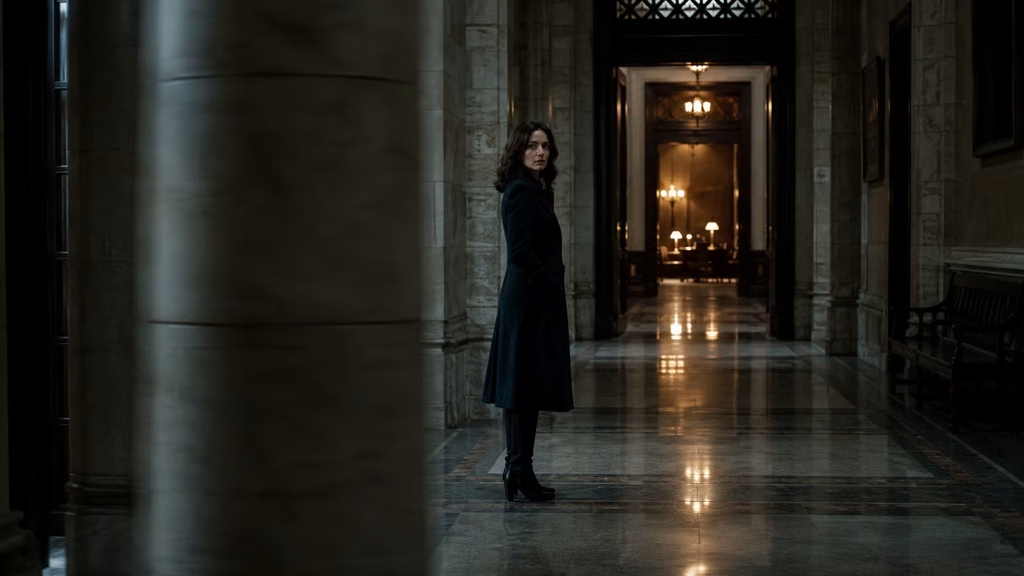
Depth can also express power. A character placed physically higher on a staircase may dominate the frame. Someone isolated at the end of a hallway may seem vulnerable. A person surrounded by near bodies may feel crowded even in a large location. These readings depend on performance and context, so avoid using spatial symbolism mechanically. The composition should grow from the scene’s relationships.
Framing, negative space, and edges
Frame edges are part of the depth design. A cropped foreground object suggests proximity. A background doorway cut by the edge can make the location feel larger than the visible set. Negative space gives a distant layer room to breathe and can direct attention toward an approaching character.
Look for natural frames, but do not force every shot through a doorway or arch. Repeating the same device can make the visual language predictable. Sometimes the best depth cue is a clean strip of wall separating a face from a distant window. Sometimes it is an empty floor that leads from the lens to the actor.
Lines should support the intended direction. Floorboards, table edges, shelves, and light streaks can lead toward the subject. Lines that point away from the action may pull the eye out of the frame. A strong diagonal can add energy, while horizontal layers may create stillness. Choose according to the scene, not according to a checklist.
Avoiding the common mistakes
Adding clutter instead of depth
Depth does not require more objects. A pile of foreground props can make the shot difficult to read. Start with one near shape, one subject plane, and one background anchor. Add only what improves the relationship.
Blurring everything behind the actor
A blurred background is not a substitute for a designed background. If the location contains no useful changes in light, shape, or scale, blur will only hide the problem. Sometimes stopping down and showing more of the room creates a stronger result.
Putting bright points behind faces
Practical lights and windows are attractive on a monitor, but a bright point close to a face can steal attention. Dim it, move it, flag it, or place it where the eye can travel to it after the main action.
Creating accidental tangencies
A background line that appears to grow out of an actor’s head, a hand that merges with a chair, or a foreground edge that cuts through an eye can flatten the composition. Walk around the camera and check the silhouette. Small lateral moves often solve the issue.
Treating every layer equally
If foreground, middle ground, and background all have equal contrast, color, movement, and detail, the viewer has no clear entry point. Decide which plane carries the shot’s main information. Let the other planes support it.
Ignoring sound and performance
A layered image can fail if the staging makes the dialogue impossible or forces actors into uncomfortable positions. Depth is not only a visual exercise. Check microphones, eyelines, movement paths, and focus marks before committing to an arrangement.
Depth layers in small rooms and low-budget productions
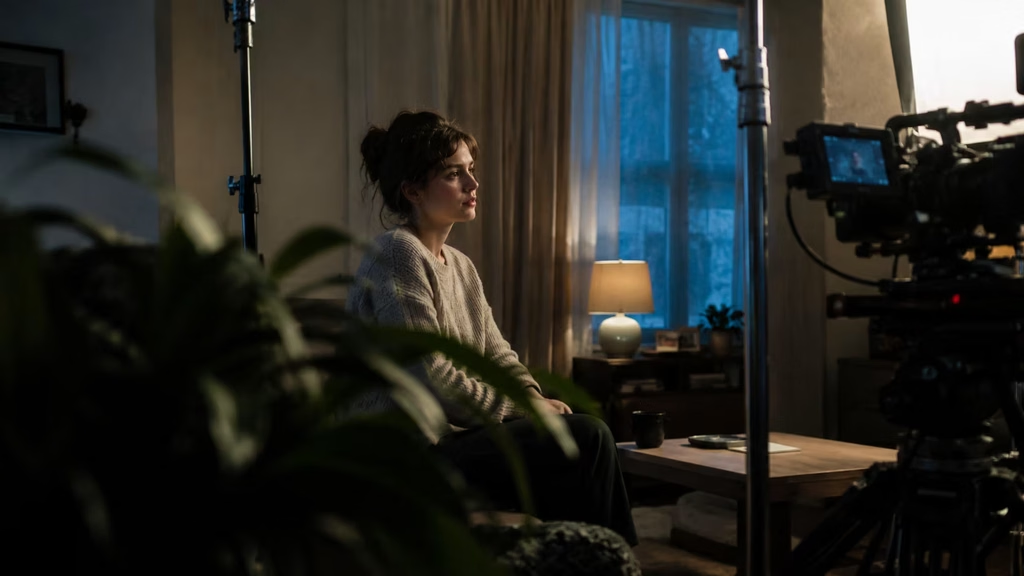
Limited space can make depth harder, but it can also encourage more inventive framing. A small room may offer a doorway, a mirror, a kitchen counter, or a window. Use the camera close to a near edge and let the background run away from it. Even a few feet of separation can read clearly with the right composition and light.
If the location is shallow, create layers with reflections. Shoot through a mirror, glass, or a dark window, taking care with unwanted reflections of the camera and crew. Use a foreground practical or piece of fabric to create a near plane. A person can enter close to camera and settle farther back, changing the composition during the shot.
Lighting can make a small space feel deeper. Keep the foreground controlled, place the subject in a separate value, and let the far wall fall into a quieter tone. A visible doorway into a dark room may suggest more space than a brightly lit wall. Do not overfill every corner.
Long lenses can compress a small room in an interesting way, especially when characters are arranged along a hallway or through multiple openings. Wide lenses can make the room larger, but they also reveal its limits. Test both approaches before deciding that the location cannot support the shot.
Planning a layered shot
A simple floor plan is enough. Mark the camera, the near foreground object, the main subject, the background anchor, and the possible movement paths. Note which planes need focus and which need light separation. You can draw this on paper or make a quick phone photograph with rough annotations.
During a scout, stand at the intended camera position and look for three things: an edge close to camera, a subject position with room to move, and a background detail that adds context. If one of these is missing, look for a change in height. A low camera can use a tabletop as foreground. A raised camera can see over a chair into a deeper corridor.
Test the shot at the actual aspect ratio. A widescreen crop may remove a useful foreground edge or leave a bright background object near the frame boundary. Check the lens at the intended camera height, because a small change can alter the amount of floor and ceiling in view.
Watch the shot without sound. Does the eye know where to begin? Then watch it with the scene’s dialogue or action. Does the staging support the meaning? Finally, view it in motion. A composition that looks balanced in a still frame may become confusing when an actor crosses between layers.
When a flat frame is the right choice
Depth layering is not a rule that every shot must follow. A flat composition can be deliberate. A character may feel trapped against a wall. A frontal arrangement may create formality, surveillance, or emotional distance. A blank background can isolate a face and remove the comfort of a surrounding world.
The useful question is not, “How do I add more depth?” It is, “What spatial feeling does this scene need?” If the answer is isolation, keep the space spare. If the answer is discovery, build a background that rewards attention. If the answer is pressure, compress the layers or place bodies close together. Technique serves the dramatic idea.
A film becomes visually persuasive when its spatial choices vary with its story. Deep, busy frames can make a quiet scene feel observed. A sudden flat close-up can strip away that protection. A sequence may move from clear separation to crowded overlap as relationships deteriorate. Depth is most powerful when the audience senses a change, even if they never name the method.
A practical checklist
Before shooting a depth-layered composition, check the following:
- Can you identify a useful near plane, a main action plane, and a far plane?
- Does each plane have a job, or is any object present only as decoration?
- Is the subject separated by contrast, color, focus, movement, or shape?
- Do background lines create accidental tangencies with faces and bodies?
- Does the selected lens match the camera position and the emotional distance?
- Is the focus plan achievable at the chosen aperture and subject movement?
- Does the light describe the room without making the background compete?
- Can actors perform naturally within the blocking?
- Does the shot still read when the camera or actors move?
- Is a flat frame perhaps more appropriate for this moment?
If the answer to one of these questions is no, solve the physical problem before reaching for heavier blur, more lighting, or a more expensive lens. Move the camera. Move the actor. Open a door. Turn off a practical. A modest adjustment often does more than a complicated setup.
Final thoughts
Depth layers are built from ordinary choices: where the camera stands, how far an actor is from a wall, what crosses the foreground, where a pool of light ends, and which background detail remains visible. The technique can be elaborate, but its foundation is simple. Give the viewer enough evidence to feel the distance between things.
The strongest layered shots are not crowded diagrams. They are readable spaces with a point of view. A soft near edge may make us feel hidden. A distant figure may quietly change the scene. A line of light may pull us toward a door before we know why. Those effects come from arranging real elements in relation to one another, then allowing focus, exposure, movement, and performance to work on top of that arrangement.
Practice by taking a familiar room and making three versions of the same shot. First, flatten it. Put the subject against the simplest background you can find. Next, add a foreground frame and a distant anchor. Finally, keep the layers but change the lens and camera position. Compare the results without judging them by sharpness alone. Notice how your sense of proximity, privacy, and attention changes.
That exercise reveals the main lesson of depth cinematography: space is not a background waiting to be photographed. It is part of the scene’s meaning.
Continue reading
Further insights from the Journal

Have a story in mind?
Bring your next project into focus.
Tell us what you are creating and what you want the audience to feel.